Results 1 to 7 of 7

Thread: 3M Headlight Restoration (Pictures)

  1. #1
    Sr Member
    Join Date
    Mar 2013
    Posts
    3,760
    Thanks
    3,360
    Thanked 1,031 Times in 700 Posts
    Mentioned
    199 Post(s)
    Tagged
    1 Thread(s)

    Post 3M Headlight Restoration (Pictures)

    ******DISCLAIMER: PICTURES PROVIDED FOR REFERENCE ONLY > THE KIT COMES WITH GOOD STEP BY STEP INSTRUCTIONS > PLEASE READ THEM ALL IN DETAIL******

    I restored my headlights this past Saturday as 1 was beginning to haze and both looked quite rough after being weathered for 170K of driving.

    The kit is available at Can. Tire for around $35 dollars.

    Remove bumper if you feel the need to. It makes the process easier, will prevent damage to bumper and will make access to the lowest most corner of the lens much easier. I was short on time and was able to reach the corner of the lens just fine without removing the bumper.

    You need:
    - a drill with a pair of steady hands
    - microfibre cloth
    - paper towel
    - extra masking tape (optional)
    - spray bottle filled with water (optional)
    - patience (not optional)

    The kit includes:
    (6) 500 grit sanding pads
    (4) 800 grit sanding pads
    (1) sanding pad attachment for drill
    (1) roll of 3M masking tape
    (1) 3000 grit wet sanding pad
    (1) rubbing compound
    (1) synthetic was sealant
    (1) foam buffing pad
    (1) INSTRUCTIONS

    Time required: 2-3 hours. Don't rush. Be careful.

    Difficulty: 2.5/10 (1 stickers and Plastidip, 10 engine swap)

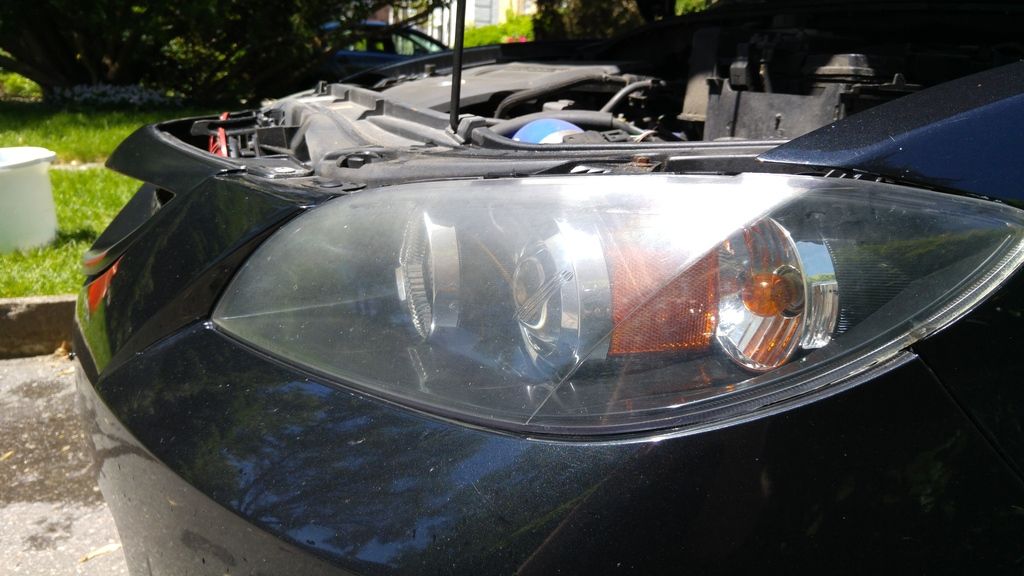
    BEFORE >
    [IMG][/IMG]


    PREP
    Clean lens and Use all of the masking tape provided, then use even more. Unmasked areas will be damaged by the abrasive sanding pads. Also note that the tape will get wet in later steps so best use a lot. Its just masking tape, go nuts.

    [IMG][/IMG]

    500 GRIT
    Detailed technique is outlines in the instructions. Slow and steady, back and forth motions preferred. There are 6 pads total, I used 3 each. Use paper towel to remove particulate and unclog pad (there was a lot of particulate) when needed and switch pads as they wear down and do not sand anymore.
    This is the most discouraging step as the damage looks horrendous.

    [IMG][/IMG]

    800 GRIT
    4 pads provided, 2 per headlight. Clear particulate from lens and pads with paper towel as before. Scratches begin to get finer, clarity improved.

    (400 to 800)
    [IMG][/IMG]

    [IMG][/IMG]

    3000 GRIT WET SANDING
    only 1 pad provided. Keep wet by spraying the lens and pad with water. A white slurry will begin to appear, make 3-4 passes per lens.
    scratches greatly reduced, clarity improving.

    [IMG][/IMG]

    RUBBiNG COMPOUND
    Put dime sized amount on foam buffing pad, smear all over lens. finish buffing when hazy compound disappears. Repeat by adding another dime sized amount for added desired clarity. (no pictures) I was getting tired.

    WAX SEALANT
    Rub into lens with microfibre cloth. Immediately remove after application.

    AFTER / RESULTS
    It worked. I would recommend this product provided you have all the tools, read the instructions and do not cut corners.
    The photos do not do the new clarity justice. The lenses look very clear and are smooth to the touch.
    I will update how the headlights look in the coming months.

    [IMG][/IMG][IMG][/IMG]

    Good luck, feel free to PM for any questions.

  2. The Following 5 Users Say Thank You to Kiewan For This Useful Post:

    Aitch (06-10-2015),Jackal (06-09-2015),jay93 (06-08-2015),jswift79 (06-09-2015),soccerboy1491 (06-08-2015)

  3. #2
    Armchair Detailer Jackal's Avatar
    Join Date
    Jul 2010
    Location
    Richmond Hill
    Ride
    2012 Porsche 911
    Posts
    8,186
    Thanks
    1,369
    Thanked 977 Times in 644 Posts
    Mentioned
    133 Post(s)
    Tagged
    0 Thread(s)

    Default 3M Headlight Restoration (Pictures)

    Great job kiewan!!

    Was the wax sealant included in the kit?

  4. #3
    Jr Member Squisher's Avatar
    Join Date
    Dec 2014
    Location
    Vernon, BC
    Posts
    297
    Thanks
    20
    Thanked 82 Times in 60 Posts
    Mentioned
    5 Post(s)
    Tagged
    0 Thread(s)

    Default Re: 3M Headlight Restoration (Pictures)

    I've used the same kit on a 350 I could've used your write up. Nice.

  5. The Following User Says Thank You to Squisher For This Useful Post:

    Kiewan (06-10-2015)

  6. #4
    Sr Member
    Join Date
    Mar 2013
    Posts
    3,760
    Thanks
    3,360
    Thanked 1,031 Times in 700 Posts
    Mentioned
    199 Post(s)
    Tagged
    1 Thread(s)

    Default Re: 3M Headlight Restoration (Pictures)

    Quote Originally Posted by Jackal View Post
    Great job kiewan!!

    Was the wax sealant included in the kit?
    Yep the pouch included has enough wax to do both headlights around 3 times over.

  7. #5

    Join Date
    Mar 2009
    Location
    Kitchener
    Posts
    5,736
    Thanks
    213
    Thanked 1,156 Times in 643 Posts
    Mentioned
    295 Post(s)
    Tagged
    0 Thread(s)

    Default Re: 3M Headlight Restoration (Pictures)

    I did this on my old 06...worked well. I'm not sure if the kit changed but for really pitted headlights it could use one step coarser sandpaper to really remove material. Also I'd highly recommend not only removing the bumper but also taking the headlight housing out of the vehicle to do it. It lets you get more even coverage all the way to the corners.

    - 2021 Porsche Macan GTS -
    - 2016 Lexus NX200t F Sport -
    - 2010 Mazdaspeed 3 Black Mica - SOLD -

  8. #6
    Sr Member
    Join Date
    Mar 2013
    Posts
    3,760
    Thanks
    3,360
    Thanked 1,031 Times in 700 Posts
    Mentioned
    199 Post(s)
    Tagged
    1 Thread(s)

    Default Re: 3M Headlight Restoration (Pictures)

    Update:

    The lenses are still relatively clear but beginning to haze again SLIGHTLY. Still a good product which has works for a few years well.

  9. #7
    Sponsor - GTA Retrofits
    Hyperion's Avatar
    Join Date
    Dec 2010
    Location
    Richmond Hill
    Age
    34
    Posts
    5,855
    Thanks
    229
    Thanked 1,089 Times in 541 Posts
    Mentioned
    252 Post(s)
    Tagged
    1 Thread(s)

    Default Re: 3M Headlight Restoration (Pictures)

    I advertise it as a 8-10 month fix, so 2 years is pretty good!
    Modifications? I've forgotten more than I remember. Click here for the list.

Similar Threads

  1. Headlight Restoration Adventure
    By Jackal in forum Exterior & Interior Maintenance
    Replies: 22
    Last Post: 08-14-2013, 12:01 AM
  2. 3M headlight restoration kit
    By zoomzoom! in forum Exterior Styling & Appearance
    Replies: 13
    Last Post: 07-11-2011, 12:23 PM
  3. Headlight restoration
    By 2DXTRM in forum Exterior Styling & Appearance
    Replies: 9
    Last Post: 09-08-2009, 01:53 PM

Posting Permissions

  • You may not post new threads
  • You may not post replies
  • You may not post attachments
  • You may not edit your posts
  •