Results 1 to 16 of 16

Thread: Eonon GM5151 - 2004-2005 Mazda 3

  1. #1
    Newbie Mangtoos's Avatar
    Join Date
    Feb 2013
    Location
    Mississauga
    Posts
    92
    Thanks
    0
    Thanked 2 Times in 2 Posts
    Mentioned
    1 Post(s)
    Tagged
    0 Thread(s)

    Exclamation Eonon GM5151 - 2004-2005+ Mazda 3

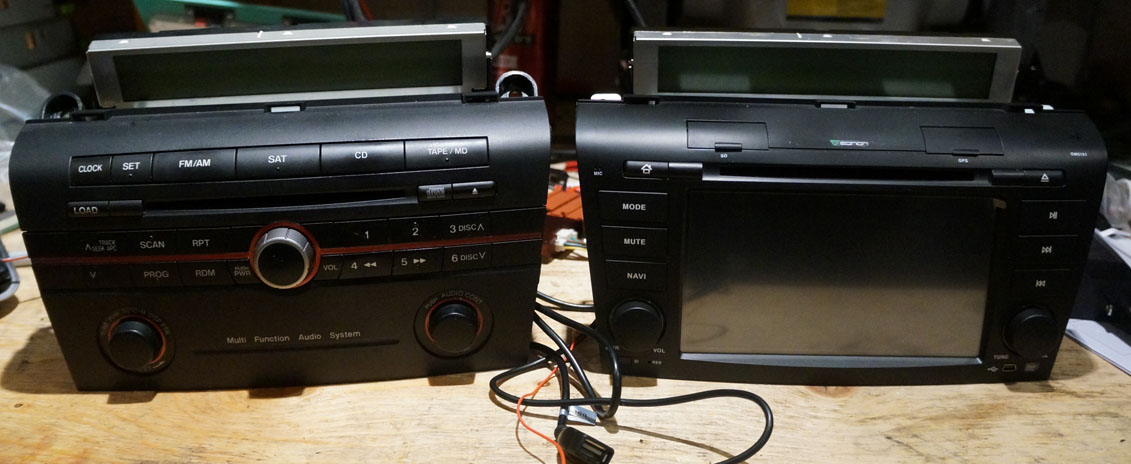
    I just received my Eonon GM5151 unit today, and have begun the process of figuring out how to install this into my 2005 Mazda 3 without causing any problems. The GM5151 is pretty much the same thing as the D5151, but it includes a NFC reader/controller that is supposed to allow for quick connection and screen mirroring of any android device. It was only $40 extra, so I figured it was worth it since I'm looking to have a Nexus 7 on the dash as well. I'm going to hopefully document my progress as I go, and provide my opinion of the GM model is worth the additional cost over the D model. Once successful, I'll likely start doing more with this and experiment with reverse/dash cam installation and AV input methods, different GPS software, etc.. I'll try to update this thread as I do that. This could be considered a mini how to and review.

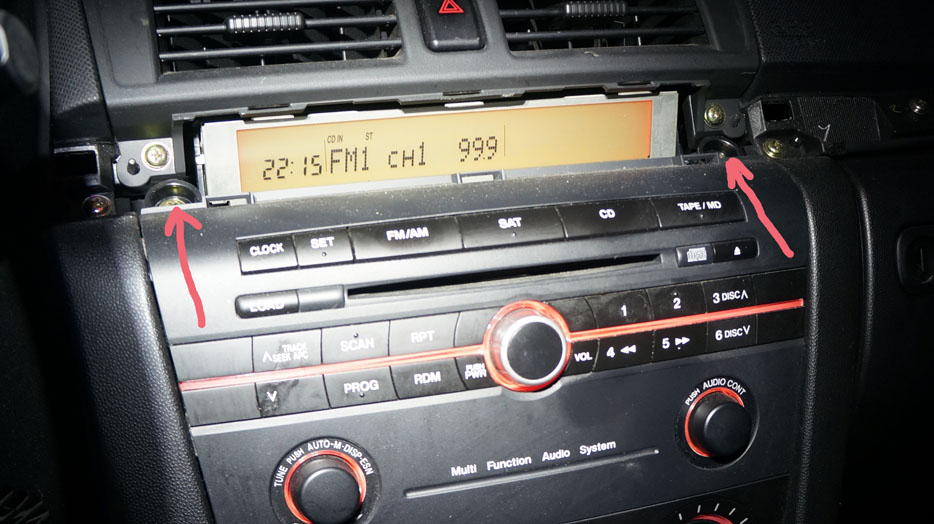
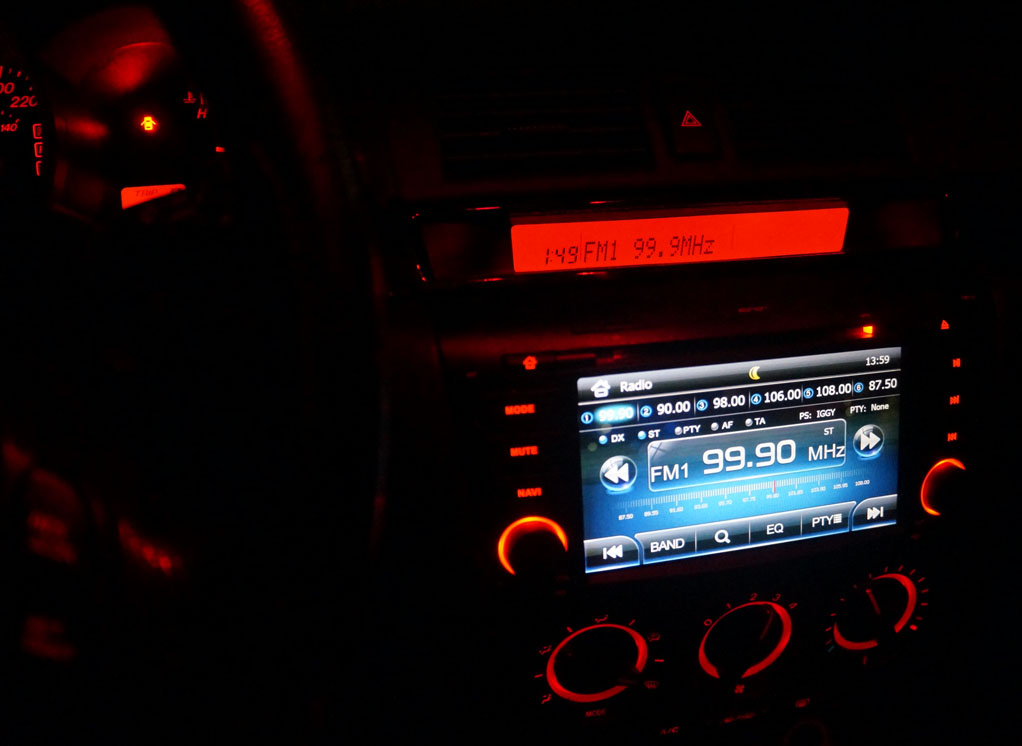
    This unit is for 2004-2009 models, but I'm calling out 2004-2005 because the LCD screen on these cars are not compatible with the Eonon 5151 (or pretty much anything similar). I don't get fancy temperature displays or any information about my car today. This means, as is, it will be blank and unusable. I purchased a 2008 LCD screen off of ebay for $40 off of a crashed car, and plan to wire this into the existing canbus to make it work.

    Hopefully this will be useful to someone.
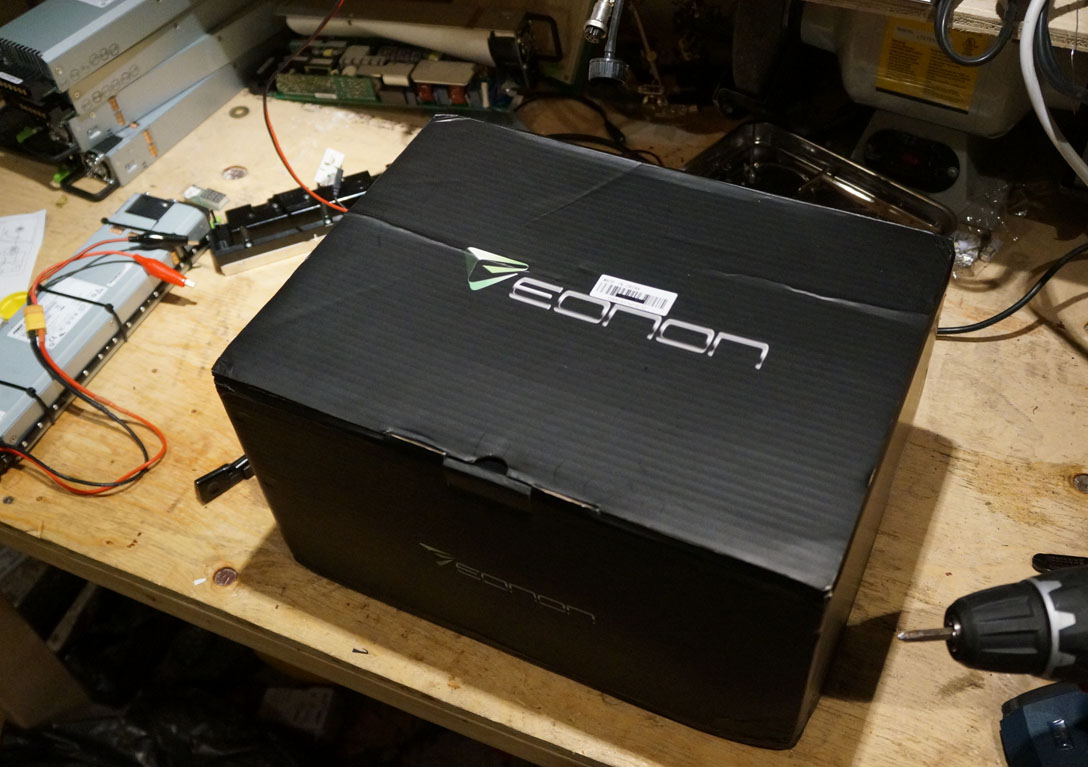

    1. Unboxing

    After removing the package paper and bubble wrap, the box is revealed:


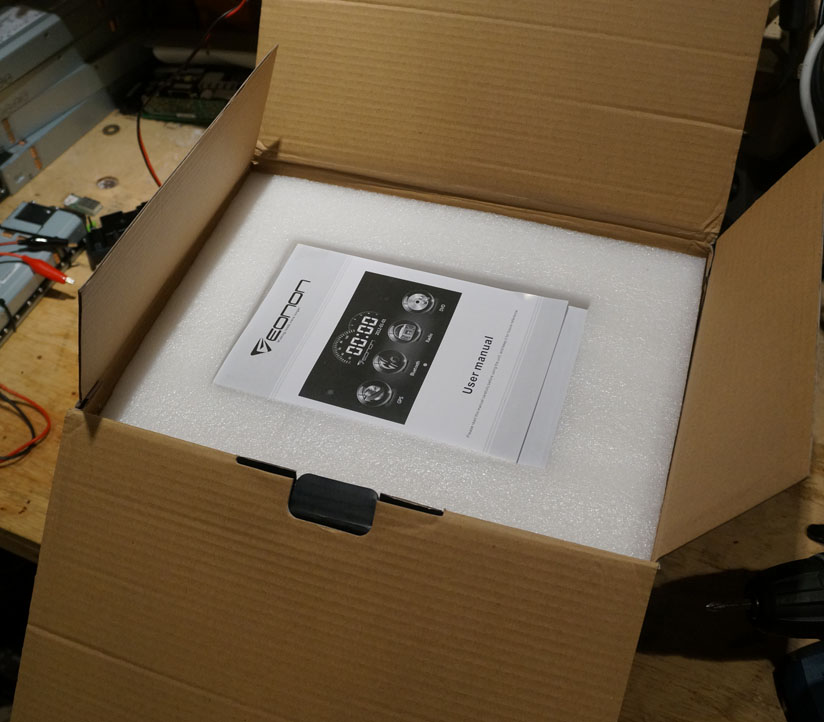
    Which has the documentation nicely placed at the top when you first open it.
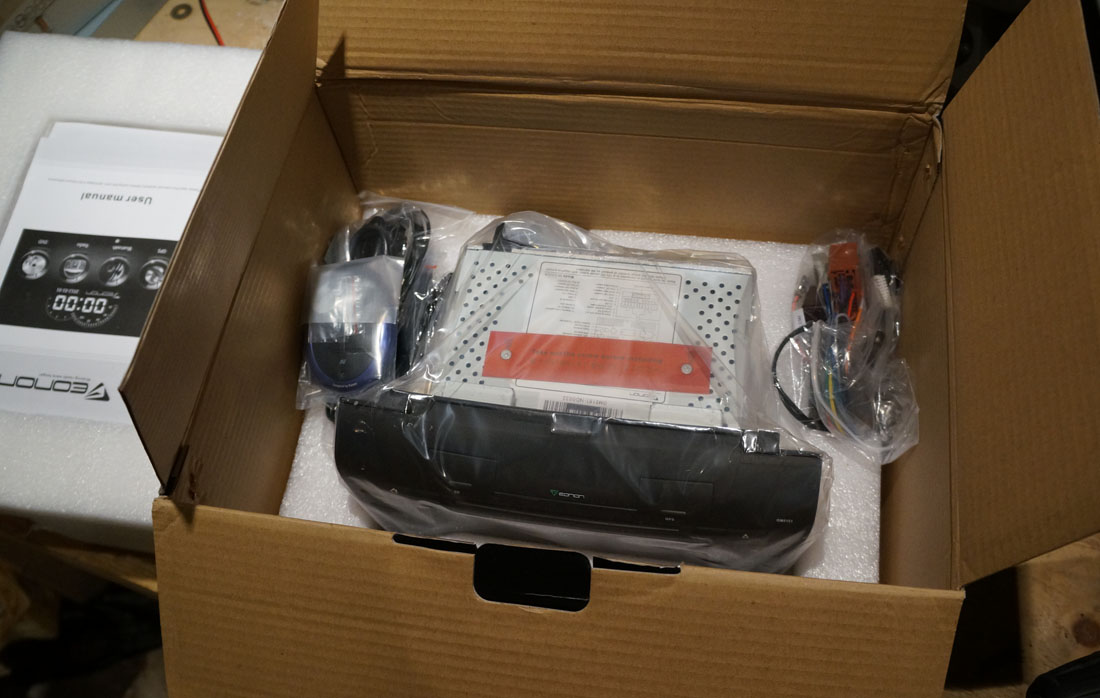


    Under the foam:


    Overall I'm quite impressed with the packaging. It's a good first impression. Almost everything I order from China comes loosely wrapped in bubble wrap which is package taped up and shipped. This was packaged in such a manner that there is little chance of damage.


    There are a ton of connectors and components, which makes me excited. All of the cables were bagged or have plastic caps on them to prevent damage. I'm used to antenna ports with covers, but even all of the video cables were capped which would prevent input interference or accidental shorts for connections you may not use. Quite impressed.


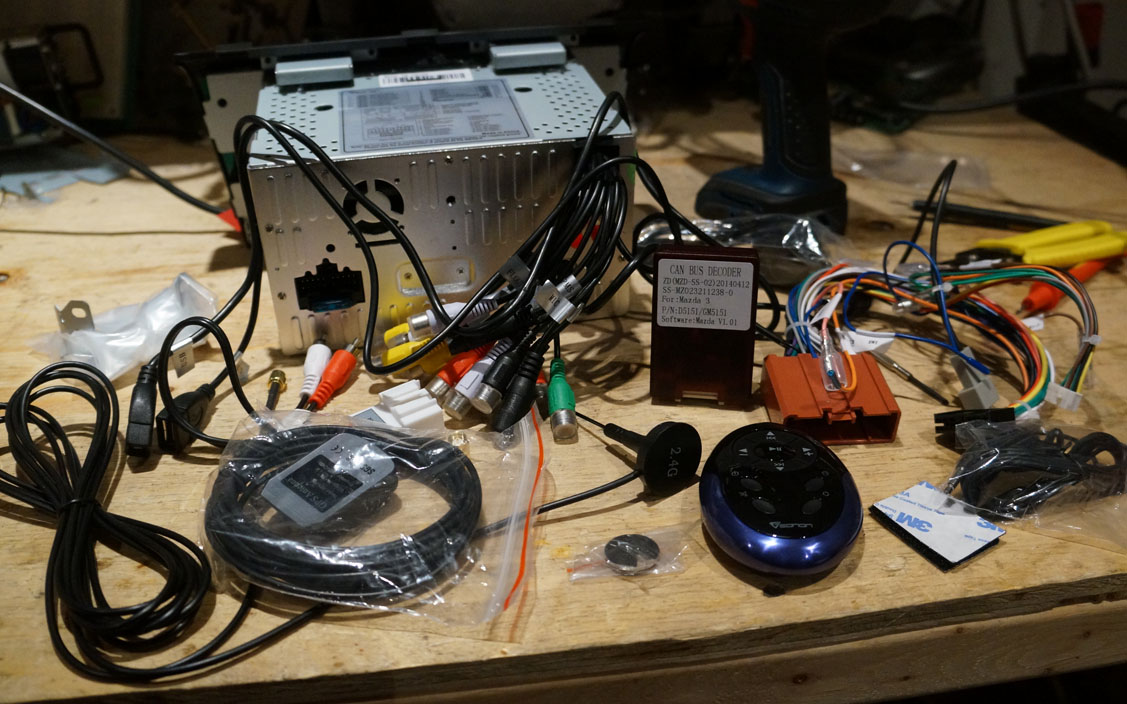
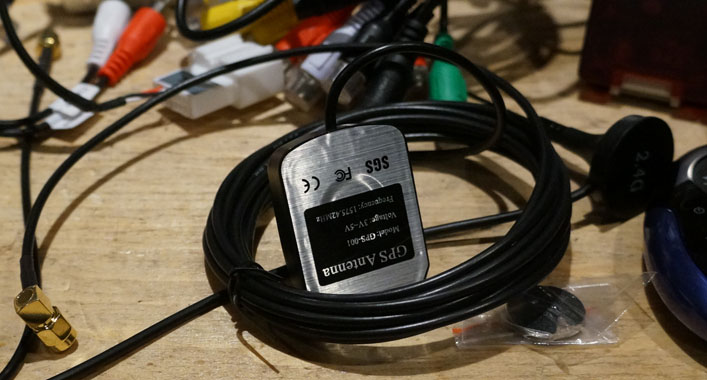
    One thing that concerns me right away is the GPS module. Reading reviews and issues, I've noticed many people have complained about a lack of GPS reception from this unit. This leads me to my next task, making sure this isn't a problem for me.


    2. GPS

    Since the GPS will be mounted under the dash monster tons of wires and metal (which may act as unintentional antennas) I suspect their will be tremendous amount of EM interference where this thing will be installed, and it doesn't appear that it is designed to help mitigate that. Now you could route this thing outside of the dash, and maybe put it on your roof (which would work very well), but that isn't very practical, nor would it be pretty.


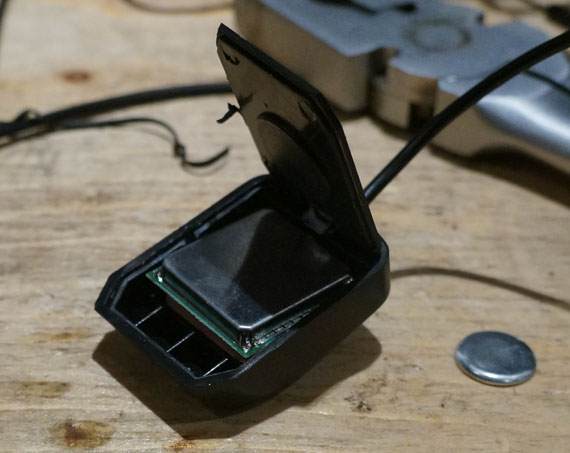
    I opened up the GPS to take a look what I was dealing with, and to confirm the antenna position. The GPS appears to be a fairly common external antenna which you can purchase from China for about $5-$10 with shipping. I'm not sure on the update frequency, but it's probably pretty bad (1hz or so). I'm going to see what I can do with this, but this might be worth replacing at some point. Unfortunately the underside of the antenna is covered with a metal box which is soldered to the board, so it would be too much of a pain in the ass to add an SMD RF filter inside, so I'm limited to controlling the EM reduction from the outside.


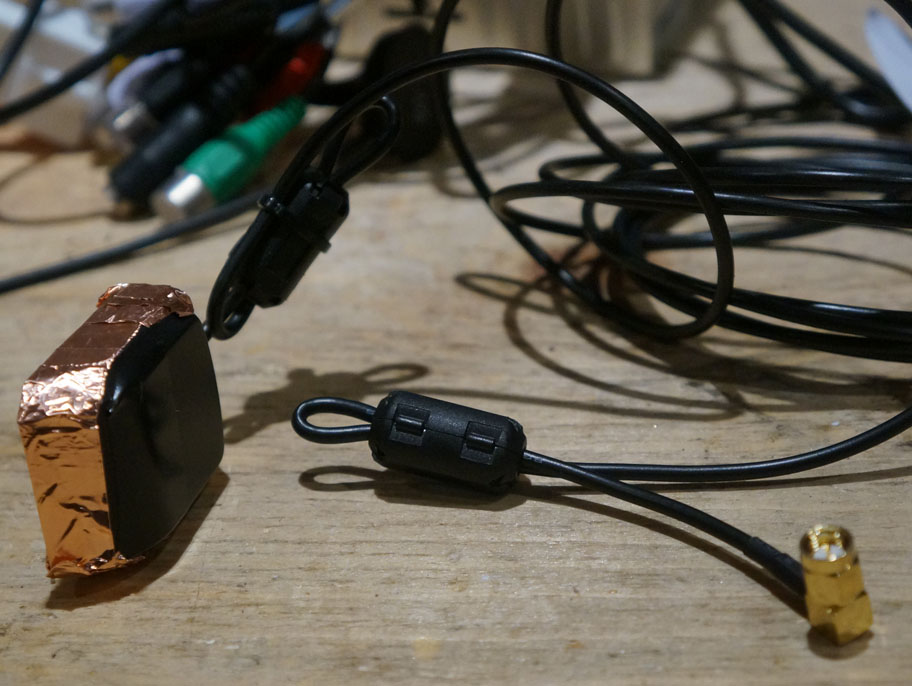
    I double routed both ends of the cables through ferrite rings to reduce the EM interference along the cabling itself. I also put copper shielding along the bottom and sides of the unit to block as much EM interference from hitting the antenna itself from below. Since I plan to mount this at the top of the dash from below, the only thing above the antenna should be plastic and window. This is probably the best I can do without replacing the GPS outright. Hopefully it's enough.


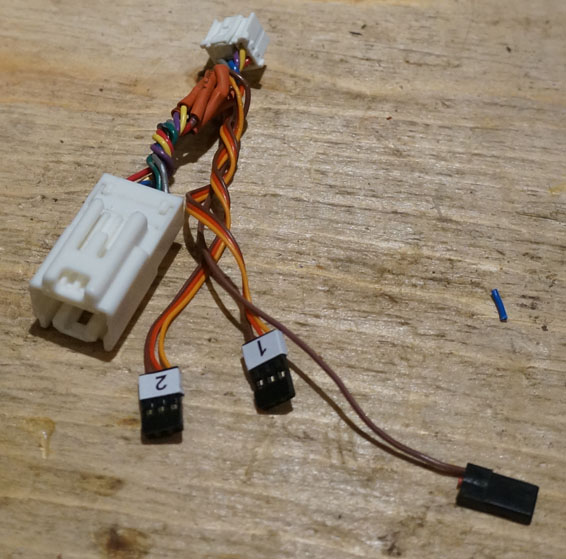
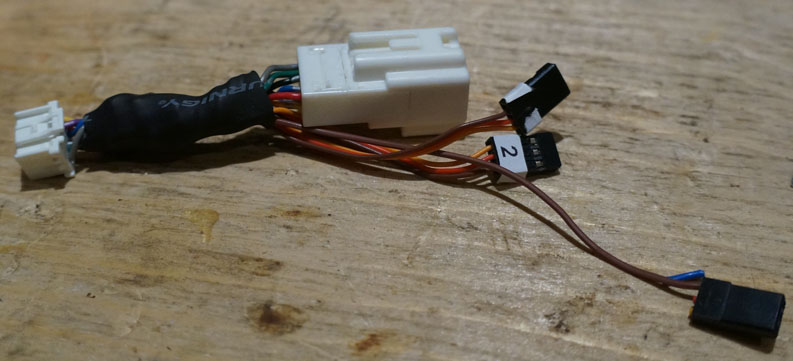
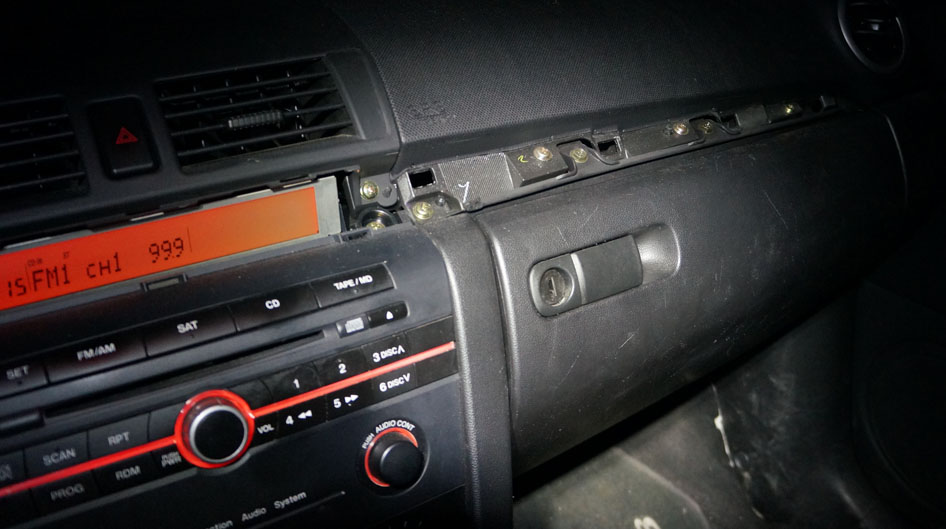
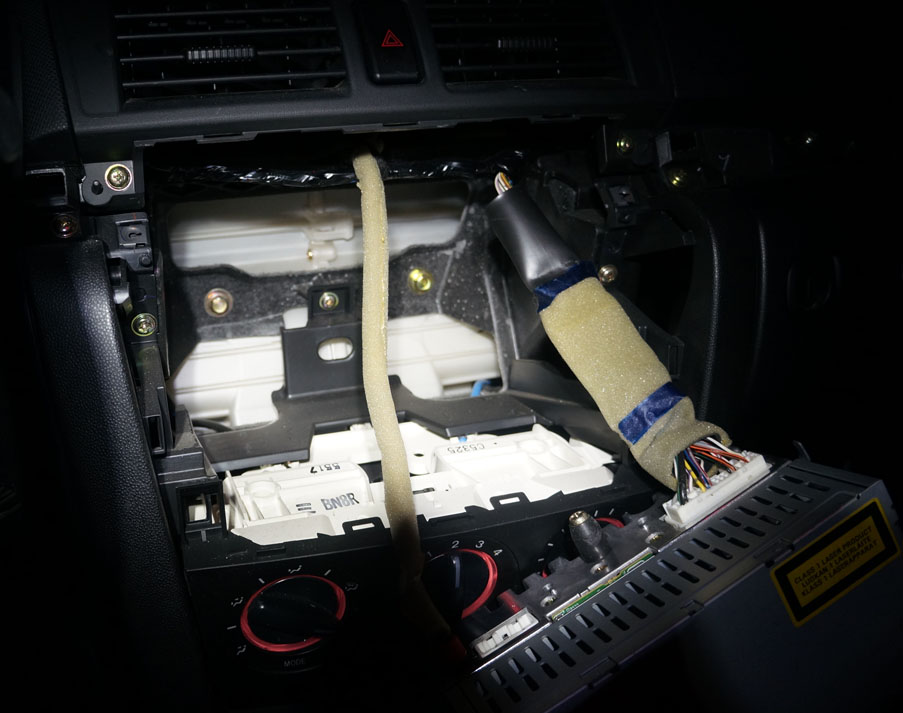
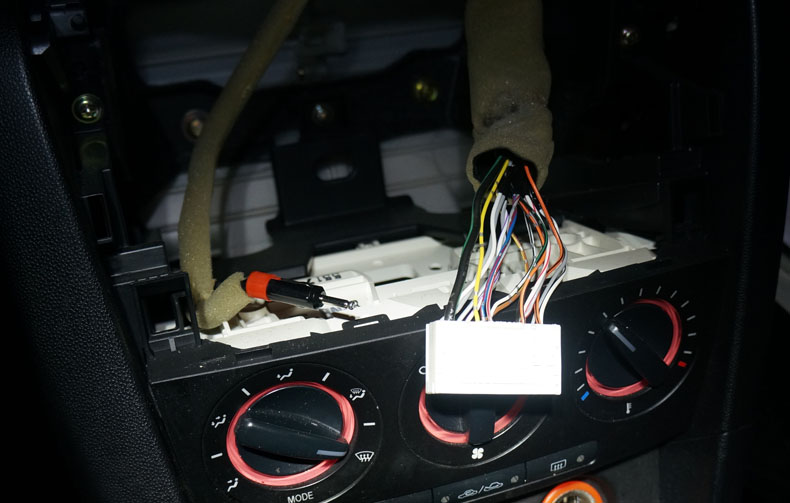
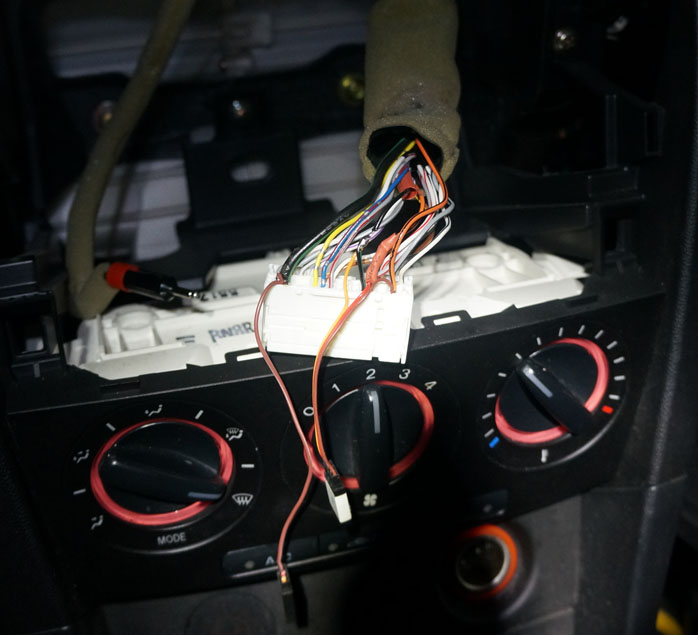
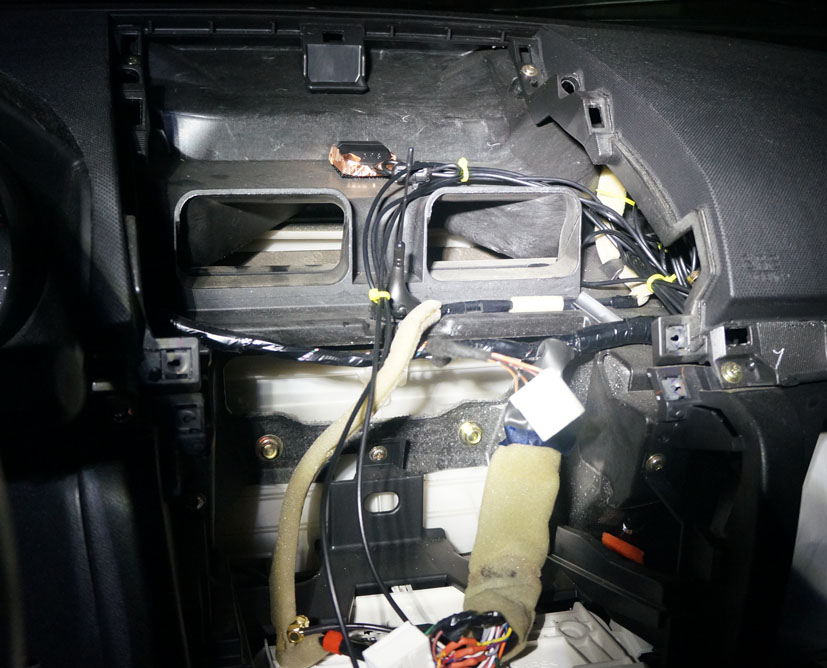
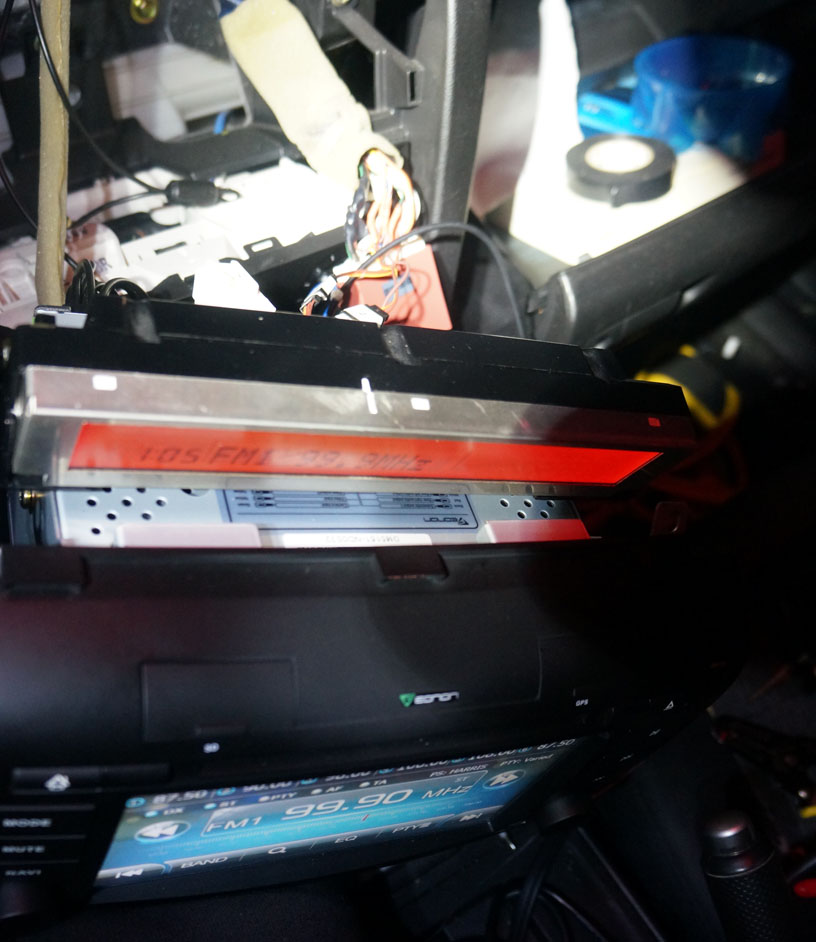
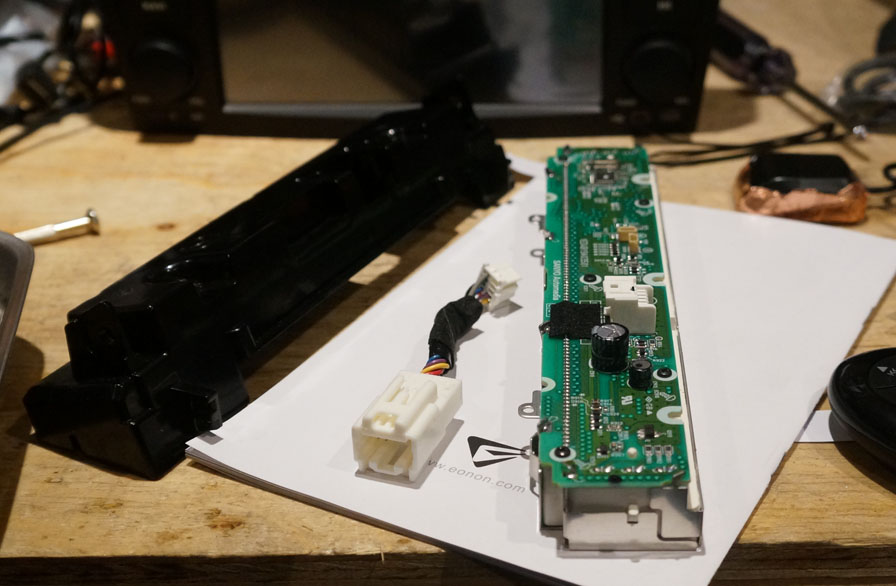
    1. LCD Screen Wiring


    Next on my list of things to do is get the 2008 LCD screen ready to mount inside the harness. I'm thinking I want to keep the existing connector intact as is, so I've opened it up to look around for the best place to connect the cables I'll be connecting into the canbus. It looks like splitting the wires in the existing connector is probably my best path.


    To be continued....
    Last edited by Mangtoos; 05-08-2014 at 01:02 AM.

  2. #2
    Newbie Mangtoos's Avatar
    Join Date
    Feb 2013
    Location
    Mississauga
    Posts
    92
    Thanks
    0
    Thanked 2 Times in 2 Posts
    Mentioned
    1 Post(s)
    Tagged
    0 Thread(s)

    Default Re: Eonon GM5151 - 2004-2005 Mazda 3

    Following some wiring diagrams I found...


    I wrote down the connecting paths and took 3 connectors I had lying around to cut and solder into the existing wires. The idea is that if I ever decide to put my old radio back in (if I crash the car or something), I can do so without having to worry about wires I soldered into the canbus directly, and can simply disconnect the 3 connectors. I might also really hate this thing, so being able to revert with little effort would be nice.


    After connecting them in, I properly wrapped each connection. I labeled each connector so I know where to plug it in on the other side.


    I wrapped everything together to keep it clean and resistant to breaks. This may look intimidating, but with a cheap soldering iron and a heat gun anyone should be able to do this.This is by far the hardest part of the install, with the exception of doing this on the other end in the car, which brings me to my next section... The installation!


    4. Installation

    Now comes the fun part. Ripping the car apart.


    First thing to do is open the glove compartment, and then on the left top of the compartment gently pull up until you hear the cover unclick. Work your way to the left all the way over the radio unclicking the rest, then back to the other end where you will slide the whole cover left to remove it.


    Next remove those two screws. I was super lazy and used my cordless drill, which saved me a whole 5 seconds. Seriously, this is too easy.


    After the two screws come out, pull it out. I was expecting a lot more screws to deal with, so I ended up squeezing my drill in the air to make it look like it was harder.


    Push a clip on the cable holding the canbus cable into the radio (don't just yank, it won't come out that way), and the pull it out. Remove the antenna. There are the only two connectors you have. Clean right? Not for long.


    Now I wired the other end of the cables into the canbus similar to the other connector. A bit more painful on this end since I don't have the comfort of a work bench, but not too bad. This was the hardest part of the install, which isn't that bad if you're used to soldering cables. If this is your first time, just be patient and embrace the inevitable finger burn you'll get from holding hot wires together. If you have a 2006-2009 Mazda 3 you're probably laughing your ass off at me right now since you don't have to worry about any of this shit.


    There are the two units side by side.


    Now to mount the antennas. Removing the top of the dash (2 more screws) reveals two perfect open flat surfaces to mount the antennas using some velctro sticky stuff that came with the radio (only for the GPS, so I used some extra I had lying around for the 2.4Ghz antenna). The only thing above the GPS is a few mm of plastic and windshield, and there are not a ton of wires around it (just air vents), so it's the ideal spot. There is a ton of excess cable since I really think they expect you to put these things on your roof or something. I routed it through a nearby empty area then back down to the radio.

    Next was to hook everything into the radio, and to connect the new LCD screen connectors into the new canbus connectors. The stock connector can be left hanging somewhere out of the way.


    Huzzah! We have powah! Everything appears to be working without issue, including the new LCD screen.

    Next I put everything in. There are a ton of wires and it's a pain to get them out of the way without disconnecting. The trick was to put them high and as back as possible. The eonon canbus connector computer I shoved in a corner somewhere out of the way.


    Now one thing horrible here. The rear bottom clips that come with this thing are absolutely useles. They do not snap in no matter how hard you push or jiggle the stupid thing. I would have preferred they didn't include clips at all, and I'm seriously thinking they did only to troll the person who was dumb enough to actually try using them. To get this to work, go back to the stock radio and remove the clips from there (they are white plastic, be careful not to snap them). Remove the horrible black clips on the Eonon radio, and replace them. Magically, it just snaps in the first try.


    So the basic install is done. I tested the GPS and I had 8 sats detected with decent signal, which is far more than you need for a car GPS. It looks like my method is sound, and might be worth a try if anyone is having GPS issues with their install.


    What's next? Not sure yet. Likely I'll start with trying to get some decent GPS software on here and some tunes. After that, I'll work on using the NFC controller and test the android integration. I'll also probably start fiddling with the camera inputs at some point in the future to hopefully get a reverse camera on here, as well as hook in future front/rear dash cams I plan to order/install. I'll update this thread with the results assuming people are actually interested in this stuff and I'm not just rambling to myself. But before that, some sleep...
    Last edited by Mangtoos; 05-10-2014 at 05:10 AM.

  3. #3
    Noob
    Join Date
    Nov 2010
    Posts
    30
    Thanks
    4
    Thanked 0 Times in 0 Posts
    Mentioned
    2 Post(s)
    Tagged
    0 Thread(s)

    Default Re: Eonon GM5151 - 2004-2005 Mazda 3

    Coming along nicely, Mangtoos. How's the responsiveness of the unit?

  4. #4
    Newbie Mangtoos's Avatar
    Join Date
    Feb 2013
    Location
    Mississauga
    Posts
    92
    Thanks
    0
    Thanked 2 Times in 2 Posts
    Mentioned
    1 Post(s)
    Tagged
    0 Thread(s)

    Default Re: Eonon GM5151 - 2004-2005 Mazda 3

    It's fairly responsive. I don't notice any latency that feels annoying. The only negative is the boot time since the OEM unit is almost instant.

  5. #5
    Noob
    Join Date
    Nov 2010
    Posts
    30
    Thanks
    4
    Thanked 0 Times in 0 Posts
    Mentioned
    2 Post(s)
    Tagged
    0 Thread(s)

    Default Re: Eonon GM5151 - 2004-2005 Mazda 3

    Moar pictars req'd.

  6. #6
    Noob
    Join Date
    May 2014
    Posts
    4
    Thanks
    0
    Thanked 0 Times in 0 Posts
    Mentioned
    0 Post(s)
    Tagged
    0 Thread(s)

    Default Re: Eonon GM5151 - 2004-2005 Mazda 3

    I called gm 5151 this morning. I have a m3 2008, so... the installation will be pretty easy it seems!

  7. #7
    Noob
    Join Date
    May 2014
    Posts
    4
    Thanks
    0
    Thanked 0 Times in 0 Posts
    Mentioned
    0 Post(s)
    Tagged
    0 Thread(s)

    Default Re: Eonon GM5151 - 2004-2005+ Mazda 3

    I installed my GM 5151 received quickly enough to quebec. I did the install and I noticed a problem; time on the LCD screen is not the same as on the Eonon console. In addition, after installation, Eonon console suddenly stopped. After trying to start it several times, she suddenly revived. A few minutes later, while driving in the car, the radio stopped and since nothing works. When there are a few things that works on the LCD screen it says: navi system.

    I watch carefully if everything was plugged in and yes everything is ok. We wanted to turn the radio back its place, CAN BUS began rang and « navi system » is displayed on the LCD screen. By moving a little bit, CAN BUS rings several times ...

    Eonon is in contact with me and I will probably ship the unit to the Cie

    Ouarkk!

  8. #8
    Newbie Mangtoos's Avatar
    Join Date
    Feb 2013
    Location
    Mississauga
    Posts
    92
    Thanks
    0
    Thanked 2 Times in 2 Posts
    Mentioned
    1 Post(s)
    Tagged
    0 Thread(s)

    Default Re: Eonon GM5151 - 2004-2005 Mazda 3

    The device froze on my once after I was fiddling with my car battery. Did you put a pin in the hole in the front of the device to reset it? If not, give that a try.

    The clock on the LCD screen is incorrect. I don't think you can change it without the original radio unfortunately. At least, I haven't figured out how to yet. The GPS time on the radio is nice though.

  9. #9
    Noob
    Join Date
    May 2014
    Posts
    4
    Thanks
    0
    Thanked 0 Times in 0 Posts
    Mentioned
    0 Post(s)
    Tagged
    0 Thread(s)

    Default Re: Eonon GM5151 - 2004-2005 Mazda 3

    yes indeed I tried everything, battery, fuse, reset button, etc..

    For the time it was suggested to me unplugged the battery T noon or midnight for the same time as the console.

  10. #10
    Noob
    Join Date
    Jul 2014
    Posts
    2
    Thanks
    0
    Thanked 0 Times in 0 Posts
    Mentioned
    0 Post(s)
    Tagged
    0 Thread(s)

    Default Re: Eonon GM5151 - 2004-2005 Mazda 3

    Great info @Mangtoos! Exactly what I was looking/hoping for in terms of a work-around to get the factory lcd working with the eonon unit for 2004-2005 mazda 3's. Could you share more info for the following...

    1) In the wiring diagram you shared, is the top pic (201) the eonon's ISO port (#3 on eonon gm5151 package image at the bottom of http://www.eonon.com/Car-GPS/Specifi...S/GM5151.html#) or CAN-BUS decode port (#4)?

    2) Did you essentially just take blank wires and solder one end to the original mazda 3 lcd screen wiring (from 2008 lcd screen) and the other end to eonon's ISO port (or CAN-BUS decode port, based on how you answer question 1)?

    3) Based on the diagram you shared, which wires did you connect to one another?

    4) And finally, when you turn your car lights on, does the factory mazda 3 lcd screen automatically dim?

    Your help is greatly appreciated!

  11. #11
    Noob
    Join Date
    Jul 2014
    Posts
    2
    Thanks
    0
    Thanked 0 Times in 0 Posts
    Mentioned
    0 Post(s)
    Tagged
    0 Thread(s)

    Default Re: Eonon GM5151 - 2004-2005 Mazda 3

    Quote Originally Posted by markr View Post
    Great info @Mangtoos! Exactly what I was looking/hoping for in terms of a work-around to get the factory lcd working with the eonon unit for 2004-2005 mazda 3's. Could you share more info for the following...

    1) In the wiring diagram you shared, is the top pic (201) the eonon's ISO port (#3 on eonon gm5151 package image at the bottom of http://www.eonon.com/Car-GPS/Specifi...S/GM5151.html#) or CAN-BUS decode port (#4)?

    2) Did you essentially just take blank wires and solder one end to the original mazda 3 lcd screen wiring (from 2008 lcd screen) and the other end to eonon's ISO port (or CAN-BUS decode port, based on how you answer question 1)?

    3) Based on the diagram you shared, which wires did you connect to one another?

    4) And finally, when you turn your car lights on, does the factory mazda 3 lcd screen automatically dim?

    Your help is greatly appreciated!
    I take back my last set of questions. I now see that you're connecting the wires from the 2008 lcd screen harness to the factory canbus harness and not the eonon harness.

    So to simplify my question, which wires from the lcd do you connect to the canbus? Thanks!

  12. #12
    Jr Member ValdesX's Avatar
    Join Date
    Aug 2013
    Location
    Peterborough
    Posts
    270
    Thanks
    25
    Thanked 69 Times in 38 Posts
    Mentioned
    19 Post(s)
    Tagged
    0 Thread(s)

    Default Re: Eonon GM5151 - 2004-2005 Mazda 3

    You can hold down the mode button on your steering wheel Controls to modify the time. You will also have a fuel calculator n stuff as well lol.

    Current fuel consumption
    Average fuel consumption
    Average speed
    EST km in the tank

    This thing is too awesome. Cept my bluetooth doesn't work.

  13. #13
    Noob
    Join Date
    May 2015
    Posts
    1
    Thanks
    0
    Thanked 0 Times in 0 Posts
    Mentioned
    0 Post(s)
    Tagged
    0 Thread(s)

    Default Re: Eonon GM5151 - 2004-2005 Mazda 3

    Hi
    You dont make it clear as to where the pins on the 12 way connector ,connect into the Mazda harness,would it be possible for a diagram please

  14. #14
    Newbie credential23's Avatar
    Join Date
    Jul 2012
    Location
    Vaughan
    Posts
    202
    Thanks
    4
    Thanked 15 Times in 9 Posts
    Mentioned
    2 Post(s)
    Tagged
    0 Thread(s)

    Default Re: Eonon GM5151 - 2004-2005 Mazda 3

    does this have bluetooth?


  15. #15
    Member Canadianbacon's Avatar
    Join Date
    Mar 2013
    Location
    East York
    Posts
    1,132
    Thanks
    163
    Thanked 195 Times in 159 Posts
    Mentioned
    51 Post(s)
    Tagged
    0 Thread(s)

    Default Re: Eonon GM5151 - 2004-2005 Mazda 3

    Quote Originally Posted by credential23 View Post
    does this have bluetooth?
    Yes...
    2010 GT MZ3 2.5 MSDS Headers, Custom Tune, CS SRI,CS Full CBE,CS LED conversion, 3K HID fogs, 15%Tints,Koni Str.T H&R Sport Lowering Springs, Speed3 Rims, duel 12''MTX subs, Vinyl Wrap Roof,Mirrors,Spoiler

  16. #16
    Noob
    Join Date
    Aug 2015
    Posts
    1
    Thanks
    0
    Thanked 0 Times in 0 Posts
    Mentioned
    0 Post(s)
    Tagged
    0 Thread(s)

    Default Re: Eonon GM5151 - 2004-2005 Mazda 3

    hi guys

    I installed this gm5151z unit to my mazda 3 2005, and i really wanted to know how i could connect the lcd screen just so it power up and than connect it so the auto climate information shows up on the screen.

    i got this kind of climate thing in my car


Similar Threads

  1. Eonon GM5151. IGO or Primo2
    By Dagger1966 in forum I.C.E (In-Car Entertainment)
    Replies: 1
    Last Post: 03-18-2014, 05:04 AM
  2. Eonon GM5151 - Mazda 3 2005 model
    By gious21 in forum How-To Guides & Reference
    Replies: 3
    Last Post: 01-11-2014, 01:58 PM
  3. Buying a 2004-2005 Mazda 3
    By ThatGuy19 in forum Buying a Mazda3
    Replies: 4
    Last Post: 10-04-2010, 10:16 AM
  4. LF: 2004-2005 Mazda 3 hatchback
    By Lebaunit in forum Buying a Mazda3
    Replies: 2
    Last Post: 05-15-2010, 11:35 AM
  5. Getting a used Mazda 3 GT 2004/2005
    By TokyoKiller in forum Buying a Mazda3
    Replies: 6
    Last Post: 06-19-2008, 09:39 AM

Posting Permissions

  • You may not post new threads
  • You may not post replies
  • You may not post attachments
  • You may not edit your posts
  •