Hi Guys,
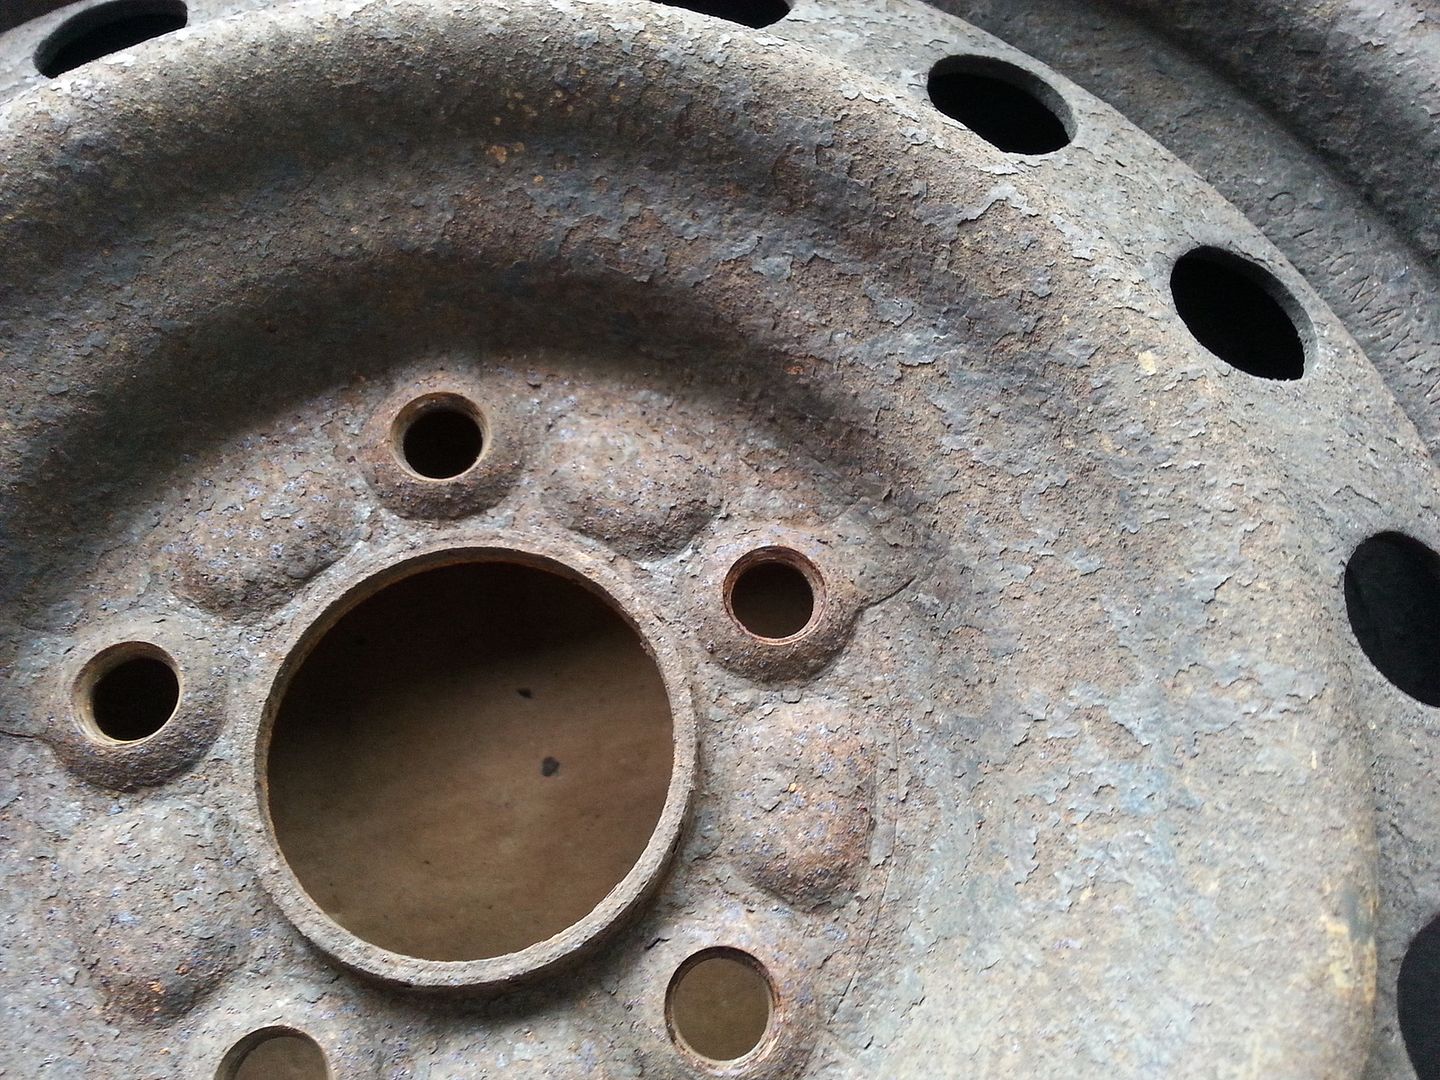
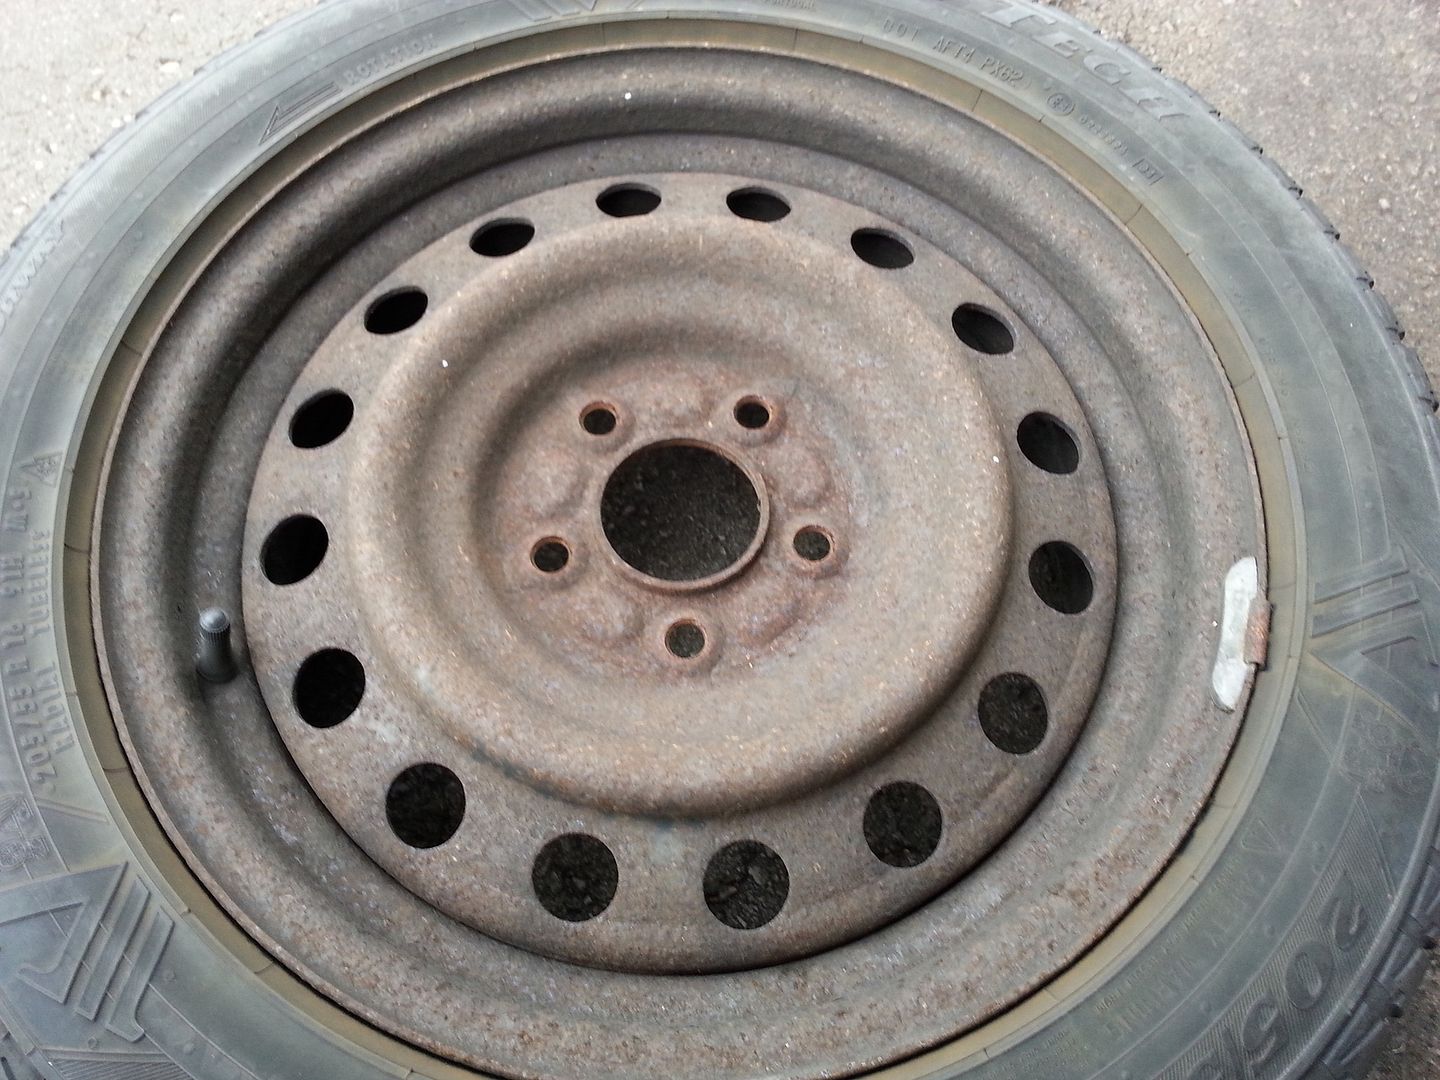
My Fiancee's Winter Steelies are in really bad shape - Pretty much 100% rust coverage.
Her Winter Tires have a year, maybe 2 years left, Tops.
It would feel like a waste to buy 4 new steelies and pay for dismount and remounting the older tires on them for just a year, so I've decided to tackle refinishing/repainting the rim.
So, I started last night, and Here's my progress so far:
Before:
Topics:
- Research
- Buy Materials
- Remove old rust/Sand from entire rim
- Remove oil/grease (if needed) from rim
- Blast clean with compressor/canned air
- Tape Masking/Protection Front
- Spray Paint Front
- Dry
- Repeat steps 6-8 for Back side
- Finishing Coat for Front and Unmasking
- Admire your handywork
Step One: Do your research.
Its not rocket science, but theres a bit more to it than I expected. Here's what I figured out - follow it if you want.
My Steelies were VERY VERY rusty. I don't expect this to extend their life beyond 2 or so more years - However if you do this earlier on (before its a rolling piece of rust) it will help alot - as such, your choices may be different.
Paint:
I decided to go with two paints, Both "rustoleum" brand.
First Can:
Rust Reformer. This is specifically to coat and bond to rust. Its a flat black, and it doesn't look very good, but it sticks to rust, and thats what I was looking for.
Second Can:
Rustoleum Gloss Black. I figured gloss would look better, and be easier to clean. Also, its for my fiancee's car, so if it doesn't look good... at least I don't have to be caught driving it

:
I think I might need a second can of the Rust reformer - I've done the fronts so far, and I feel like i've usedabout 2/3rds of the can. I'll be ok with the gloss because I'll just be doing the front faces with that.
Unless your tracking on your steelies, and you think the heat from your brakes will be enough to get your rims above 250*f, you do not need high heat enamel paint.
All paints require you to remove loose rust. Because my rims were entirely "loose rust" I realized I'd need more than some sandpaper or a wire brush.
Step 2: Shopping List
- 2 Cans Rust coating paint (aka primer?)
- 1 Can "overcoat" (color, gloss, etc) paint of your choice
- Wire brush/Wheel (I used a wheel, to put on a drill - Made my life SO much easier) (note: you WILL need a wired drill - or multiple batteries for your cordless drill)
- Painters Tape
- News Paper/Drop Sheet
- Respirator/dust mask
Total Cost: $29 (assuming you have a drill)
Step 3: Removing the Rust
Prep is 90% of the work.
I started friday night with my cordless drill. I got through half a rim before the battery died. Thankfully Crappy tire has a corded drill on sale for 20 bucks right now. I went out saturday morning and bought it.
I used a wire wheel from Home depot - 4 bucks. I went with the 3 inch size as I thought it was the best compromise to get into nooks and crannies, but still be able to do the larger flat areas. I think It was a good decision. Link:
http://www.homedepot.ca/product/wire-cup-brush/824957

Once I had a power drill, Things went smoother. I went at it steadily for about 2 hours and got all 4 rims done. They still LOOK rusty and gross, but there's no loose rust, so the paint will adhere better.
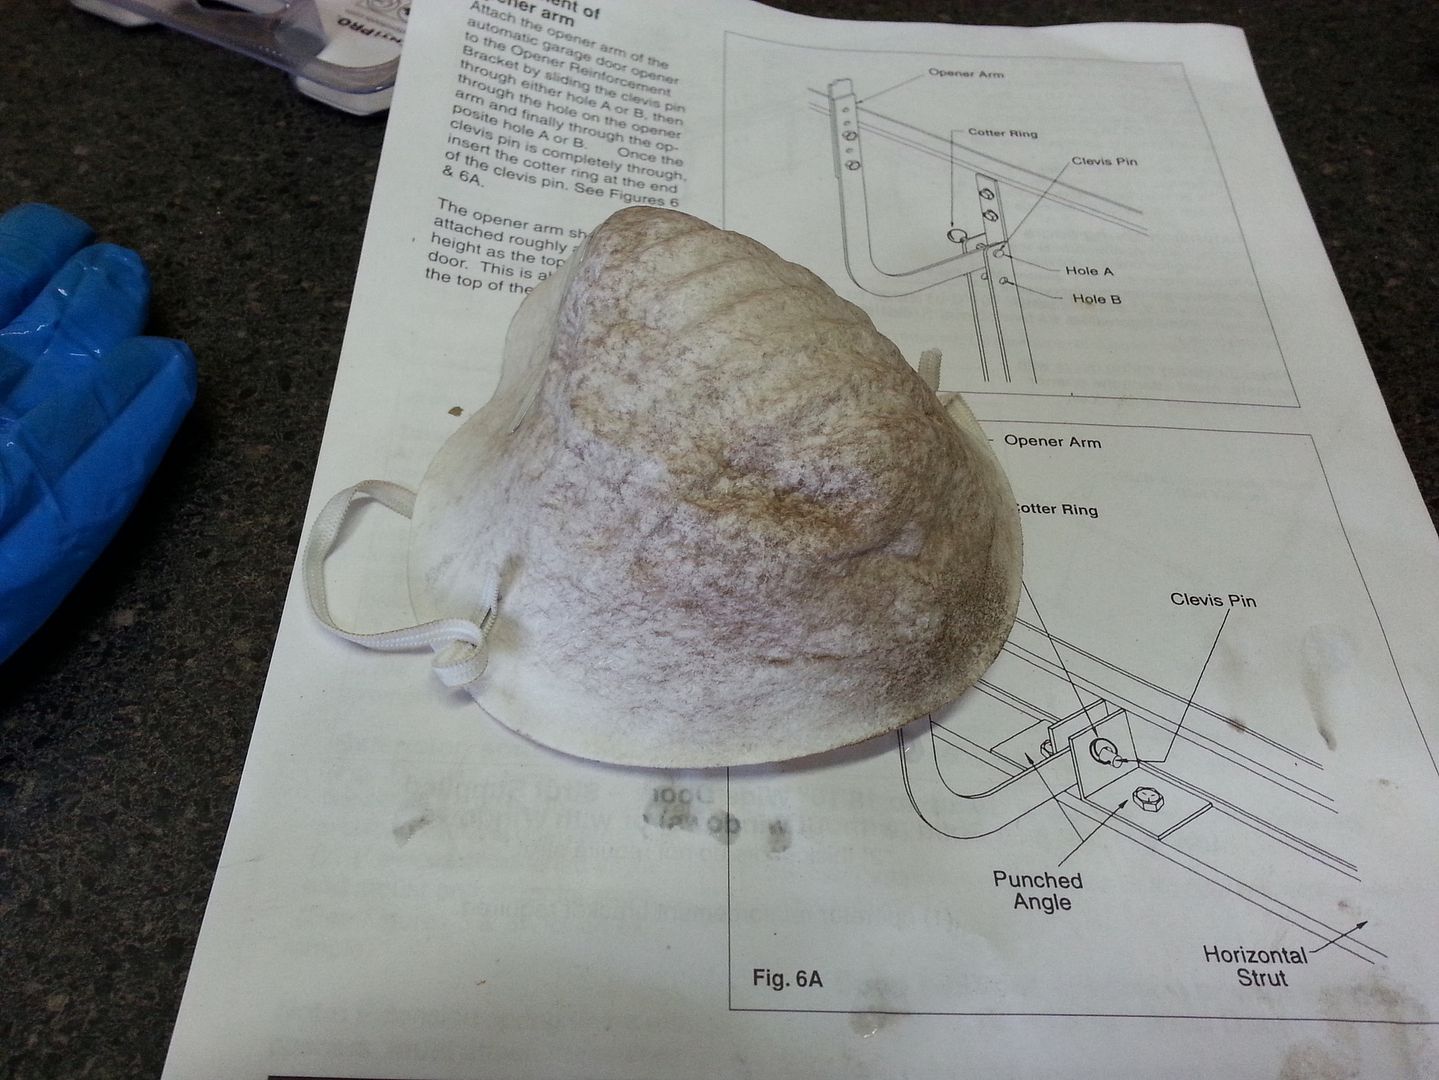
You WILL need a respirator/Dust Mask. There's not just rust and paint being thrown up into the air, but brake dust, which is known to be really bad for your lungs. I didn't use one for the half a rim on the friday night, and when I blew my nose that night... well, It was weird. I wouldn't want that shit in my lungs. I'll leave it at that.
My dust mask, after cleaning 4 rims:
 This is how the rim looked after taking the wire wheel to it:
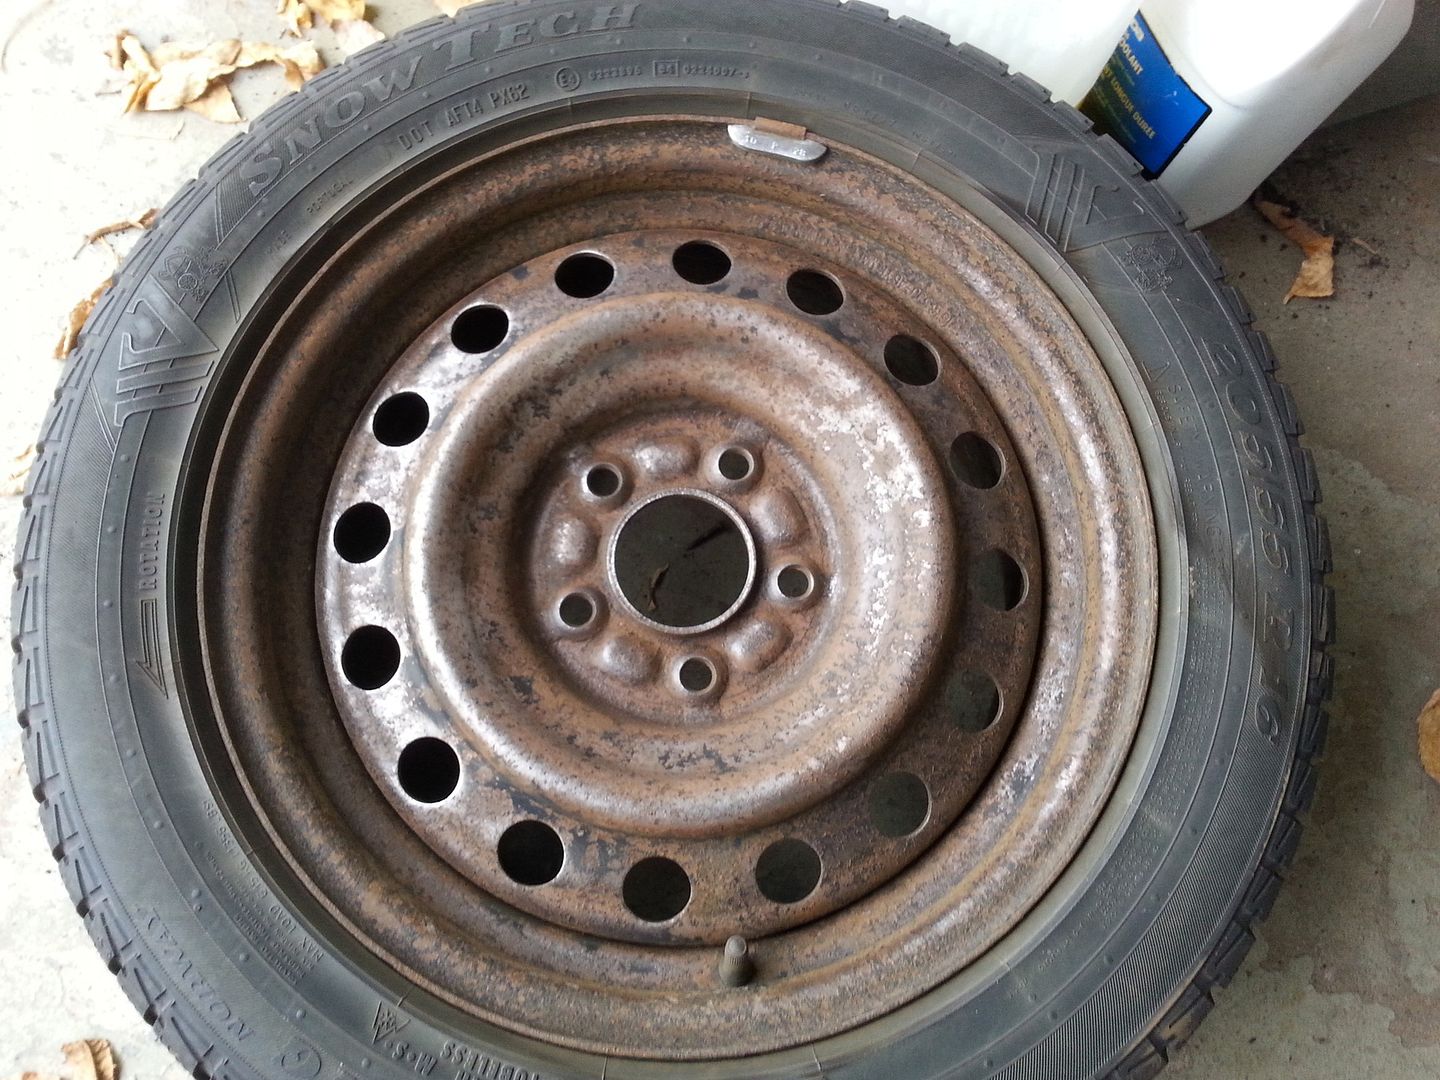
Not perfect, but a lot smoother, and you can actually see some shiny looking metal.
Step 4: Remove any grease/oil
Since I had to work at it so hard to remove the rust, I basically performed the grease/oil removal because I stripped a layer off the rims.
Some people online say brake cleaner does a good job - My concerns may be unfounded, but I'd be a bit weary of letting this sit on the rubber. Other people just powerwash and let dry. I didn't want to do this because I figured it would add to the rust issue, and it'd take forever to dry from the nooks/crannies, delaying my painting.
Step 5: Blow all the crap off
All that wire brushing and sanding coats the rims in rust dust. I used my compressor to really blast all the grit out of all the nooks and crannies. It took me a while to realize There was literally a cloud of rust dust in my garage, even with the garage door open. I'll have to clean EVERYTHING. Do this outside.
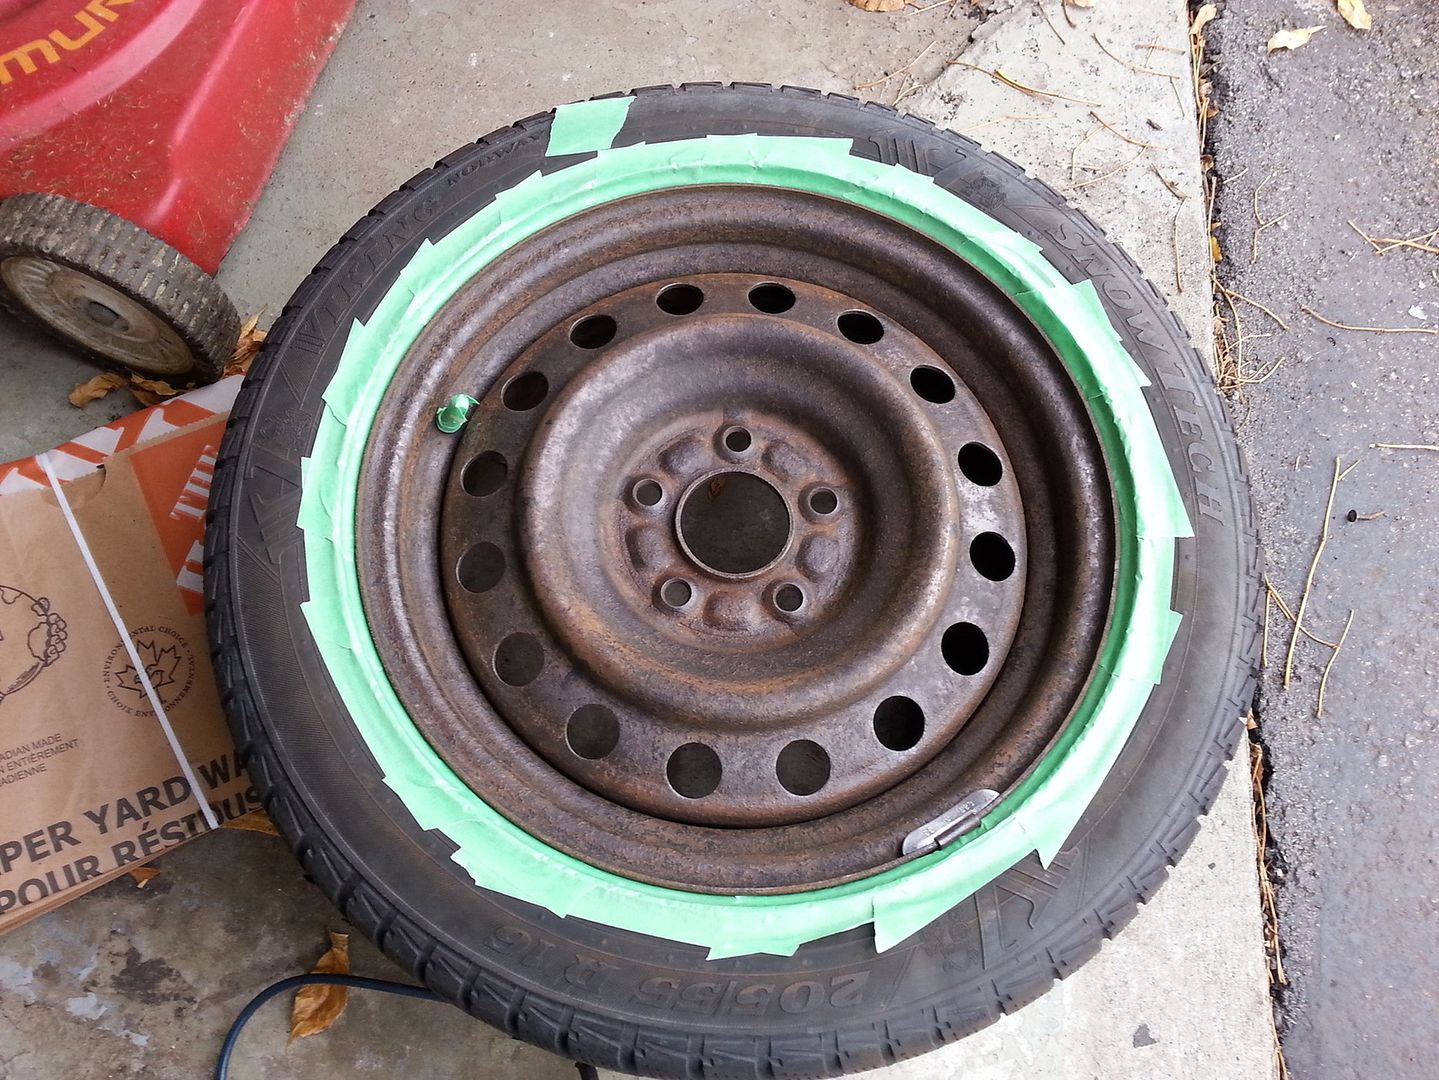
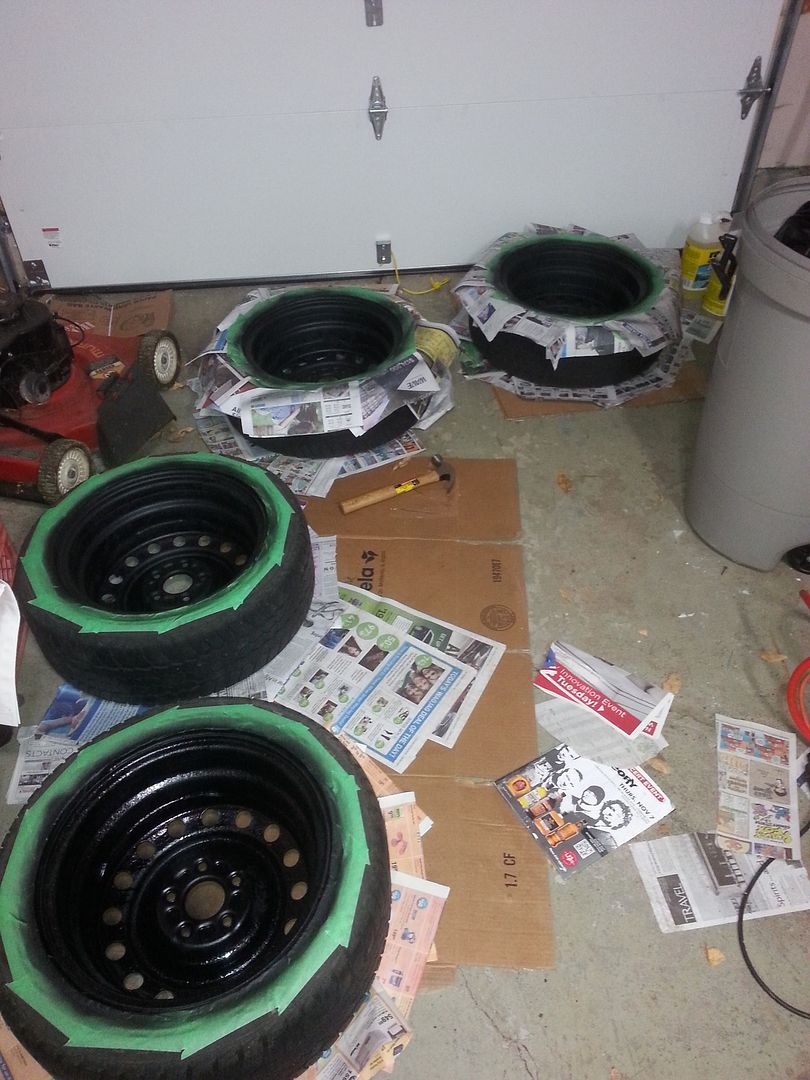
Step 6: Mask Mask Mask
This one is important - You don't want to get paint on the rubber. It'll look like ass.
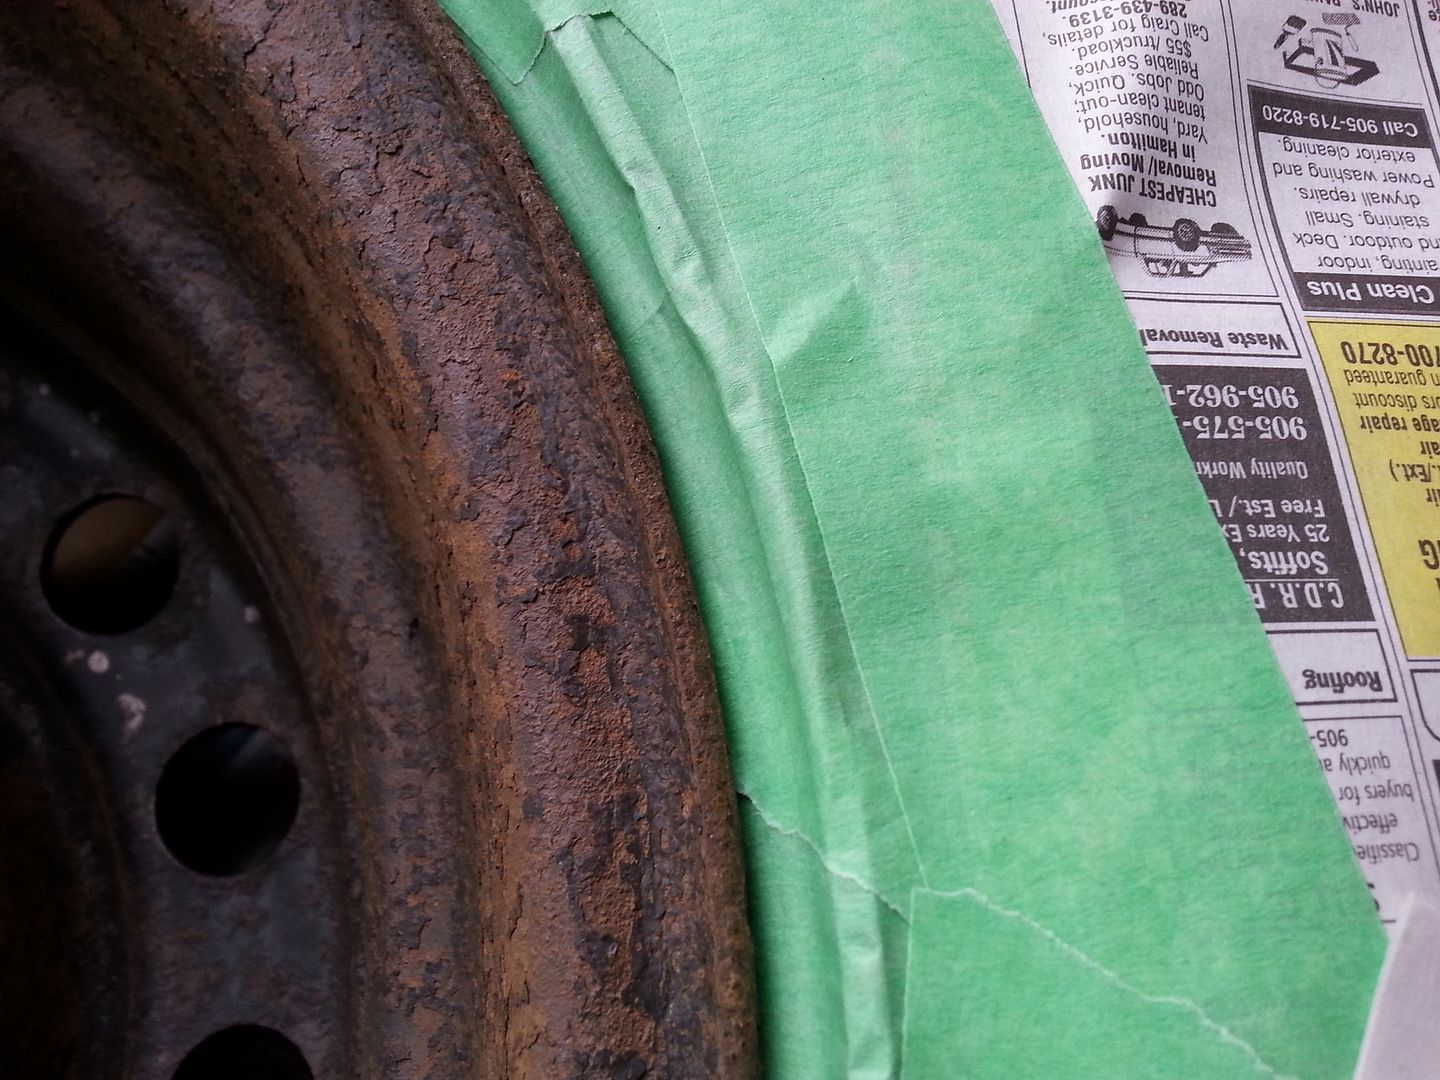
After blowing off the crap, I used painters tape alone to mask as tight to the rim as I could - The rubber I have has a bit of a rim guard, so it was tedious - 4 inch strips of painters tape, overlapping. Slide it in between the tire and the rim, and then push it down with your finger/nail. Repeat, overlapping with the last piece. Once that's done, You Get some news paper and tape it to that tape "rim" you made around the rim.
Last step, as tight as you can, Cover the valve stem in tape as well. It's hard with big fingers, but it needs to be done.
Heres the tape "rim" done. More pictures to come.
And the News Paper "shield"
Picture coming
Step 7: Spray bomb that mofo
I've never actually spray painted before. Good thing it's not my car!
:
I Quickly learned:
- Hold can upright, 12 inches from rim
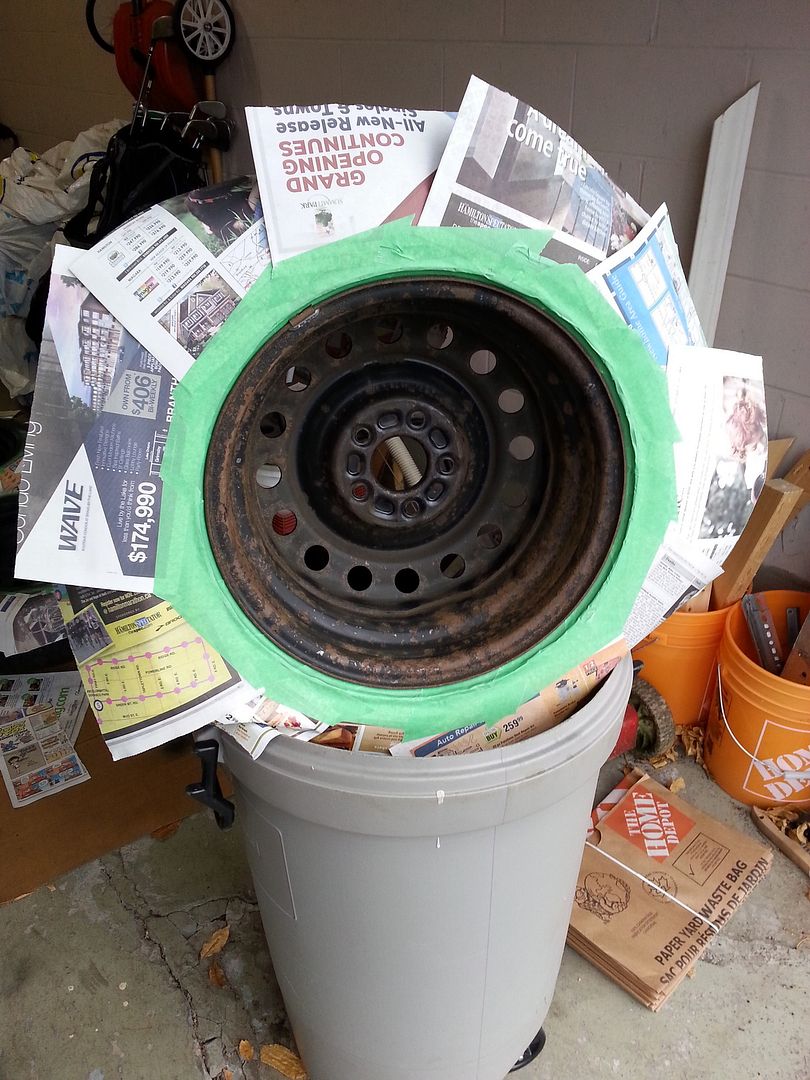
- Mount rim "upright" like it'd be on your car - you can't aim the can sideways or down - Just vertical!
- Keep the rim off the ground - its really hard to spray "up" at it if its on the ground. I propped mine up in my garbage can.
- Start moving your arm before start spraying.
- Move in quick, fluid/smooth motions.
- A spiral pattern worked well for me. It only required minimal touchups to get full coverage. I could only see one or two runs.
Here's how I "held" the tire when spraying.
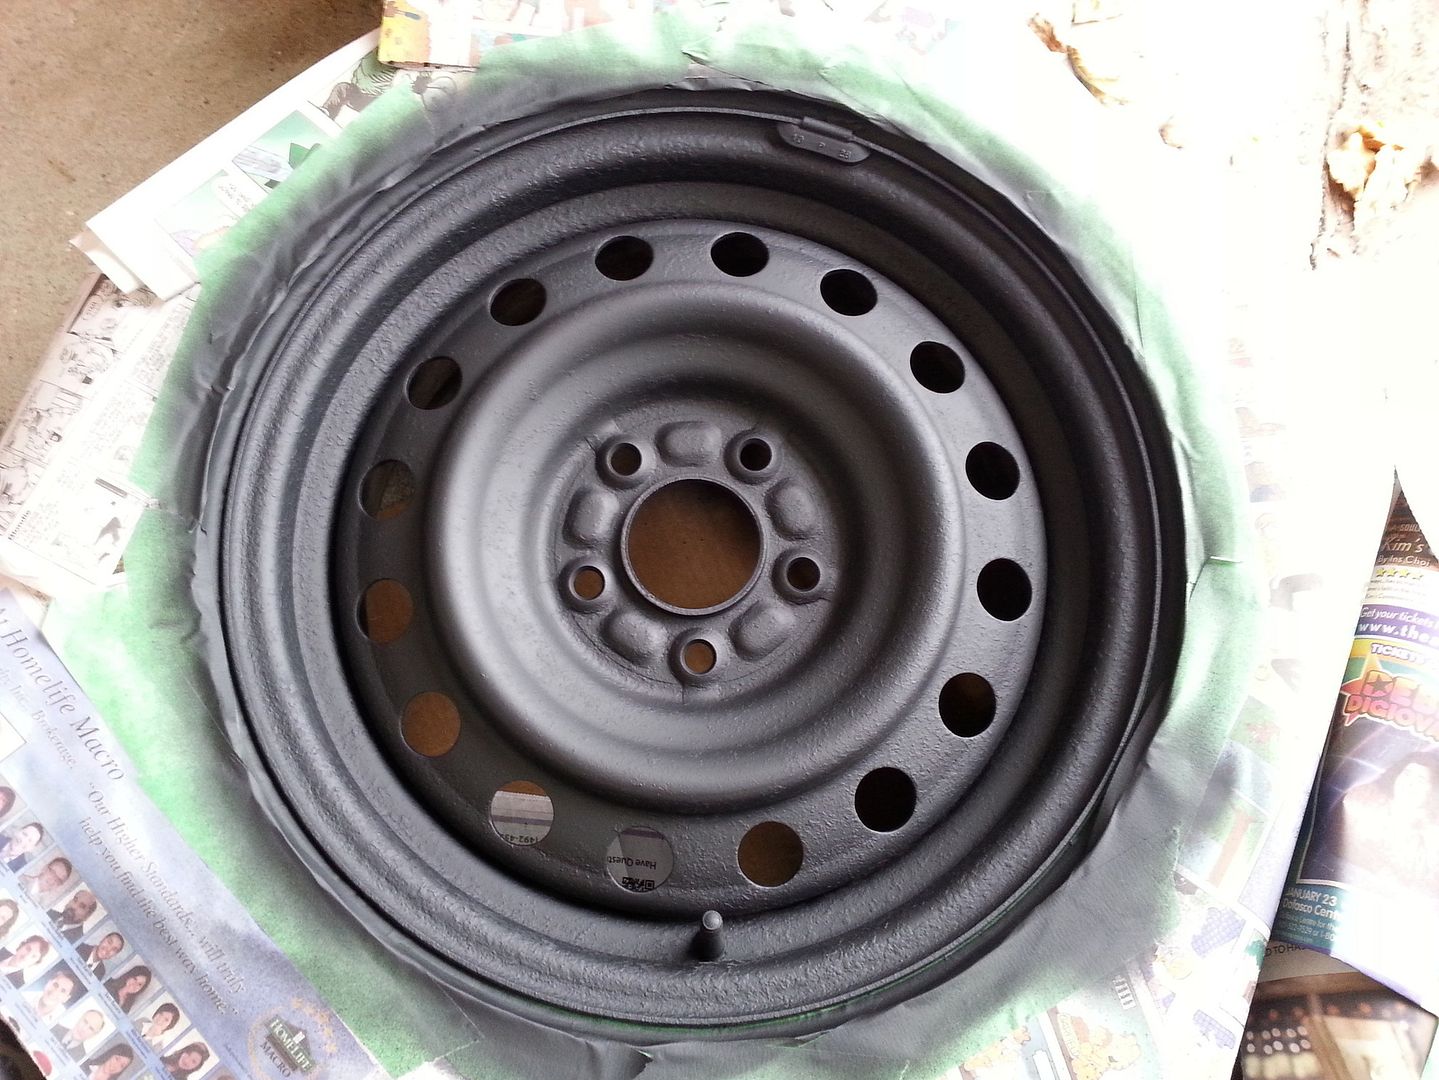
 This is what the rim looks like after one coat of the "rust Reformer" a Decent flat black.
Step 8: Let it dry
The Rust reformer calls for 24 hours. I've got a fan on them and the garage door open a few feet, but it is also raining. Not ideal.
That being said, I'm not one to follow instructions, so once its tacky/nearly dry, I'll flip the rims over, and continue on the backside, after I do the masking. Once the front is cured, (24 hours) I'll paint with my gloss black "overcoat" and i'll be done. I'll update with final pictures once i'm done. I thought I should start this thread while I was watching paint dry, because I had nothing better to do and wouldn't have done it if I waited until I was done :-)
For now, They dry, in my very dirty garage. (its not normally this bad, I swear - I had the garage door open for a breeze and it was like a tornado hit!
Step 9: Repeat Steps 6-8 for the backside
Yup. Do that. The masking, The newspaper, (hey, at least there's no valve stem this time!) etc.
Paint, and let dry.
Note: If you're not doing a color coat/finishing coat on the backside of the rim, you might want to unmask while the paint is still tacky. It will help make a cleaner line and prevent the paint from sticking to the tape.
Step 10: Overcoat/Finishing coat
I'm choosing a gloss black finish for her rims. The "rust reformer" is acting like my primer, so this should really be a quick coat to give it the gloss look. It may take 2 coats to get the desired finish - 3 or 4 if you are also using a clearcoat - (overkill for steelies, IMO)
Same steps as before for painting , but once your finished, you'll want to unmask before the paint dries - so it won't "tear" the paint off the rim when you pull the tape away.
WAIT to do your valvestem. It'll be impossible to do with wet/tacky paint without wrecking your paint job.
Step 11: Let it dry, go grab a beer, and admire your handywork. You just saved yourself some cash.
I'm still in progress, so I'll update this thread with any news as it happens. In the mean time, Time to play some video games while the paint dries. Awesome.
[I]I'll be editing this post with some more pictures.
/I]


 Reply With Quote

