Congrats mang!


Congrats mang!

Congrats dude!
How hard was it to remove the front bumper?

Thanks everyone. Mother and baby are doing well. Now for some sleepless days and nights.
Took about 1 hour first time. You'll need this link.Originally Posted by mazdaspeedemon3

http://www.novustechnic.com/mazda3/horn_install/


Basically, just work your way around the outside of the bumper whereever it may connect with another piece and pull out that screw. Just remember where it goes back lol.
Modifications? I've forgotten more than I remember. Click here for the list.
nice thanks!

Congrats!
More audio upgrades!!
Pioneer speakers and components!
Thanks to Dave2010GT for the install "help".
Still in the boxes:
Rear speakers:
Front components with tweeters (not shown):
Anyway sounds great with my 12" sub.
If anyone wants my stock front and rear speakers (i.e. one of yours broke or you are going back to stock speakers PM me and you can have them for free.) Pick up only.
"Needed" to get this. Sub, amp, component speakers, rear speakers, starter and aftermarket head unit is hooked up to my OEM battery and it was taking a beating. So I will be putting in this Optima Yellow Top this weekend. From what I heard it's a beast.
Last mod (before school starts that is)
Is the difference night andd day with the new speakers?
There is a big difference if you have an aftermarket head unit or power them with an amp. Very clear even when you blast it (which I rarely do). Mids and highs and bass are even better. I compared the speakers' weight, build, magnet and it's no contest. These are brand new speakers too. Fronts are component speakers (not plug and play - i.e. you better know what you're doing to get them to work) but the rear speakers are plug and play.
Last edited by Jackal; 09-01-2012 at 06:17 PM.
You always need to go the next step with your mods lol.
Camber arms for your pro kits and yellow top for your speakers lol
I installed the Optima Yellow Top myself today. These batteries are heavy but I managed to get the OEM one out. This one is a perfect fit for my Mazda 3. Thanks to Dave2010GT for giving me some advice on the install via text message.
This battery will definitely be able to handle the electronics and audio system in my car.
If you are planning to install this yourself, here are a couple of tips.
The battery comes with a cover which should be placed under the battery so that it's the same height as the OEM one.
There is a bar that keeps the battery in place. The second arrow below shows where the yellow cover should be.

Last edited by Jackal; 09-03-2012 at 01:39 AM.

you guys would love the text msg convo I had with him while he was trying to get this thing in the car lol!
2010 GT Sedan CWP
MODS: Too many to list!

post it!
#FREESHINGLEZ
It was pretty funny. The new baby changed my life, but I try sneak the modding in between my fatherly duties. Lol.
Camber kit for prokits and Optima yellow top which can power winches and hydraulics was absolutely necessary. Lol.
Actually I was a bit out of alignment spec so needed the camber kit and my car battery would actually die after a few days of not driving it due to the crazy load of electronics and audio I have on it. Now it fires up no problems and installing it myself probably cost me as much as an OEM dealer installed run of the mill car battery.
car is looking great! come get me when you are at the dealership next! Would love to see it and hear it in person!
Thanks G. I'll say hi to you for sure next time I am in and you can check it out.
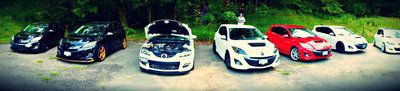
Some pics from H4H. Also I got a couple of TorontoMazda3.ca decals and wondering where to apply them (or just leave them off since I already have 2 plate covers.)

Your car needs side skirts :p
A lion would never cheat on his wife, but a Tiger Wood.
Been working on performance mods and ICE recently. May one day get them and if I do I will probably go OEM. Not on top of my list.
they all need side skirts, just so expensive for plastic. then if you go oem, you drill into the metal. if you go aftermarket you have clips and 3m tape that i cant imagine will hold up for very long.. better to spend the money on things you can use and enjoy. such as - performance mods and ICE - i know ill make sure my next car has them first.
Jackal, next year lets get a graphite photo going.
Agreed. Mazda should have included them in the GT and GS models. I think they did in the Gen ones. Always up for a photoshoot! Calling all Graphite Micas for an epic aerial Zoom Zoom pic. Lol. OK then just a regular photoshoot.
What about black mica! Don't be racist now! Haha. I've had my car less than a week and I already have the modding bug. Lord help my bank account.
Black Mica Mazda3 SkyActive-GS, 6 speed manual.
OK then. All micas will be invited for the epic Mica shoot. Go Team Mica!!
You're right about the bank account!
Last edited by Jackal; 09-30-2012 at 02:43 PM.
 Posting Permissions


 Reply With Quote